How to make a sourdough starter
5.0
(20)
Your folders
Your folders
Prep Time: 2 minutes
Cook Time: 240 hours
Total: 240 hours, 2 minutes
Servings: 1
Author : Melissa Griffiths - Bless this Mess

Ingredients
Export 5 ingredients for grocery delivery
Instructions
Step 1
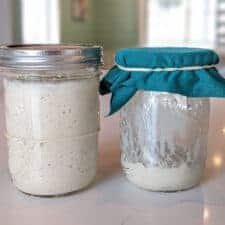
Add 50 grams water and 50 grams of flour to your jar and stir well to combine. Scrape the edges down to the bottom. Cover with a breathable top (I like to use a piece of an old t-shirt and then use the ring that came on the mason jar to screw it on or a rubber band). Set in an out-of-the-way place that stays a somewhat constant temperature (around 70 to 75 degrees F.). If you don't have something to weigh your flour, it will be about 6 level tablespoons of flour and 4 tablespoons of water.
Step 2
You can use just about any flour that you have. You'll get a quicker start by using a whole grain flour like rye or whole wheat, and you'll also have more luck using organic flours if possible (less chemical residues to inhibit yeast growth).
Step 3
Set aside for 24 hours.
Step 4
After 24 hours (day 2), add an additional 50 grams of flour and 50 grams of water, stir well, scrape down the sides, cover, and set aside.
Step 5
Day 3: add an additional 50 grams of flour and 50 grams of water, stir well, scrape down the sides, cover, and set aside. You might be seeing a few bubbles in your mixture an hour or so after "feeding" it the flour and water; that's good!
Step 6
Day 4: discard all of your starter mixture except for 25 grams (or you can start with a clean jar and measure in 25 grams of your starter mixture and add your next ingredients to the clean jar, too). Add 50 grams of flour and 50 grams of water, stir well, scrape down the sides, cover, and set aside. (This would be 2 tablespoons of your original starter mixture, plus 4 tablespoons of water and 6 tablespoons of flour.)
Step 7
Day 5: add an additional 50 grams of flour and 50 grams of water, stir well, scrape down the sides, cover, and set aside.
Step 8
Day 6: add an additional 50 grams of flour and 50 grams of water, stir well, scrape down the sides, cover, and set aside.
Step 9
Day 7: discard all of your starter mixture except for 25 grams (or you can start with a clean jar and measure in 25 grams of your starter mixture and add your next ingredients to the clean jar too). Add 50 grams of flour and 50 grams of water, stir well, scrape down the sides, cover, and set aside. (This would be 2 tablespoons of your starter mixture, 4 tablespoons of water, and 6 tablespoons of flour.) NOTE: Sometime around day 5, 6, or seven you make want to start feeding and discarding every day. If you starter is very runny after 24 hours, move to the daily discard and feed schedule.
Step 10
You are going to keep up this schedule until your starter gets lots of bubbles and grows in volume to double or triple its size a few hours after you feed it. It can happen in as short as 5 days and as long as 14 days. After day 5, start putting a mark on your jar or a rubber band marking the level of the mixture right after you fed it. Then watch to see if it increased in volume before deflating again.
Step 11
Once you start getting bubbles after you feed your starter flour and water and it doubles or triples in volume, then it is active and ready to use! It will smell like yeast dough. ALSO start using a lid that just rests on the jar (don't screw it down) instead of the fabric at this point so the top of your starter doesn't dry out.
Step 12
Use your starter to make my favorite classic sourdough loaf or any other recipes that calls for a sourdough starter.
Step 13
TO REFRESH your sourdough starter: Follow the recipe and use the amount of sourdough starter it calls for, but always make sure you are reserving at least 25 grams of starter. After you use what you need for the recipe, simply put 25 grams of starter in jar, feed it 50 grams of water and 50 grams of flour and set it aside. It'll be ready to bake again tomorrow. Or see the notes on how to store the starter if you are not baking every day.