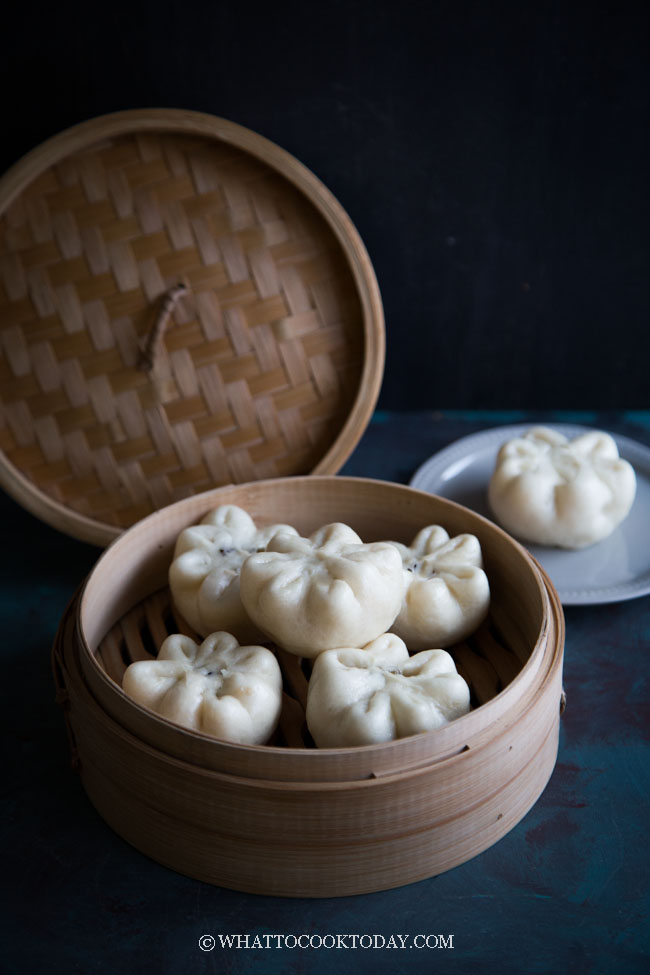
How To Make Instant Pot Chinese Steamed Buns
4.8
(6)
Your folders
Your folders
Prep Time: 40 minutes
Cook Time: 20 minutes
Total: 60 minutes
Servings: 8
Author : Marvellina
Ingredients
Export 10 ingredients for grocery delivery
Instructions
Step 1
Place the flour combination (either option 1 or 2), instant yeast, sugar in a mixing bowl. If you are using a stand mixer, use a dough hook attachment. Add cold milk or water. Add cooking oil. You may need to add more milk/water if the dough is still a bit dry. Add more teaspoon by teaspoon until the dough comes together and continue to knead for 5 minutes. If you are kneading by hands, about 10 minutes until the dough is no longer sticky and smooth. Then add in the salt and continue to knead until the dough is smooth again
Step 2
Place the flour combination (either option 1 or 2), instant yeast, sugar in a mixing bowl. Mix until you get a rough dough (it's not going to be smooth yet). Cover and rest it for 15 minutes. Then go back and knead it. You'll be surprised by how easier it is to knead it now. Knead until the dough is smooth and pliable, about 10-15 minutes. At any point during kneading, you can always stop and rest the dough if you find it hard to knead. This is to relax the gluten. Then go back to knead again and you'll be surprised by the difference it makes by just resting the dough before kneading again. It's easier on you too.
Step 3
Wrap the dough with a plastic wrap and let it rest for 15 minutes before shaping. The dough will not rise at this point. This step is to relax the gluten so you can roll and wrap the dough easily later
Step 4
Lightly dust your work surface with some flour. Divide the dough into 8 equal portions. Work with one dough at a time. Flatten the dough with your palm and then use a rolling pin to roll it out to form a circle about 4-5 inches, with a slightly thicker middle part. This is to support the weight of the filling. Don't roll the dough too thin. If you roll the dough too thin, the filling might make the steamed buns "wrinkle" later when you steam. Place the filling at the center and then gather the sides to enclose the bun and pinch to seal. Flip the bun so the seam side is down now or you can fold the edge to create flower patterns
Step 5
Cover with a clean cloth and let them proof for about 15 minutes. Let the dough rise at room temperature. If it's winter where you are, you can use your oven "bread proof" function to let them proof in there, or simply turn on your oven to the lowest temperature and then turn off and after 15 minutes, place the shaped buns in there to let them proof. This may take about 15-30 mins at a warm temperature. Don't just go by the time though. They won't necessarily double in size, but they will puff up to about 50% of its original size and feel light when you lift it up.
Step 6
You can also do a finger test by gently pushing down on the dough, it will leave an indentation but it will spring back slowly. This dough is perfectly proofed. If it springs back right away, it needs to be proofed a bit longer. If it never springs back, then you have over proofed the dough.
Step 7
Pour 3 cups of water into the inner pot of Instant Pot. Don't use the metal trivet that comes with IP because the trivet is too low and the steaming basket will get splattered by the boiling water during steaming and that will bruise the steamed buns
Step 8
I use a heat-proof bowl instead. Then I place a bamboo basket or stainless steel steamer basket on top. Press "SAUTE" and bring the water to a boil. When water comes to a boil, carefully place the buns on the steaming basket, I can only fit in about I recommend steaming one rack at a time for the best result as the buns will expand during steaming
Step 9
Drape a clean kitchen towel over the inner pot (as shown in the photo and video). This prevents condensation dripping on the steamed buns. Then put the IP cover on top. The lid is just to cover and to make sure there is just enough pressure to cook the buns and we can't lock the lid because of the towel, which is ok. There will be steam coming out from the IP, don't panic, it's normal because the lid is not tightly secured
Step 10
STEAMING TIME (just a reference): Small to medium buns with no raw meat filling needs 5 minutes to steam. Large buns with no raw meat filling need about 8 minutes. If there is raw meat filling, steam the small-medium buns for 8-10 minutes and the large ones for 15 minutes. You need to set your own timer using your phone or any digital timer
Step 11
When it's done steaming, press "CANCEL". Remove the lid and carefully uncover the towel. Transfer the steamed buns to a cooling rack to let them cool down completely. This also prevent the bottom of the steamed buns from getting soggy
Step 12
To steam the next batch, refill the inner pot with 1-2 cups of water or as needed. Press saute again to bring it back to a boil, it shouldn't take long. Then repeat the same process
Step 13
Pour 1 cup of water into the inner pot of Instant Pot. Place a metal trivet in there. Use a bamboo basket or stainless steel steamer basket. I don't recommend using a plate as the material is too thick and the buns won't cook properly. It's better to use something that has holes or ventilation at the bottom so the steamed buns can cook properly Place it on top of the trivet. Arrange 3 buns in the basket allowing about 1/2-inch space in between. You will need to do the steaming in 3 batches
Step 14
Close the lid. Turn the steam release valve to "sealing". Press "Steamer" and make sure it's on "high pressure". You can use the +/- button to adjust the pressure level. Set the timer to 3 minutes for small buns. About 5 minutes for larger buns. If there is raw meat filling, set the timer to 8 minutes. Make sure it's on high pressure. Release pressure immediately when they are done cooking
Step 15
Carefully unlock the lid and remove the steamed buns to a cooling rack to let them cool down completely
Step 16
Continue with the second batch. Refill the inner pot with some water if necessary. Arrange the rest of the proofed buns in a basket and turn the steam release valve back to "sealing" again and repeat the process. This time it will pressurize almost immediately
Step 17
Pour 1 cup of water into the inner pot of Instant Pot. Place a metal trivet in there. Use a bamboo basket or stainless steel steamer basket. I don't recommend using a plate as the material is too thick and the buns won't cook properly. It's better to use something that has holes or ventilation at the bottom so the steamed buns can cook properly. Place basket/rack on top of the trivet. Arrange 3 buns allowing about 1/2-inch space in between. You will need to do the steaming in 3 batches
Step 18
Close the lid. Turn the steam release valve to "Sealing". Press "Pressure Cooker" and make sure it's on "high pressure". You can use the +/- button to adjust the pressure level. Set the timer to 1 minute. If there is raw meat filling, set timer to 4 minutes. It will take about 1-2 minutes to pressurize. When it's done cooking, release pressure immediately
Step 19
Carefully unlock the lid and remove the steamed buns to a cooling rack to let them cool down completely. This is important so the bottom of the steamed buns won't be soggy
Step 20
Continue with the second batch. You shouldn't need to refill with any water. Arrange the rest of the proofed buns in a basket and close the lid again and turn the steam release valve back to "sealing" again and repeat the process.