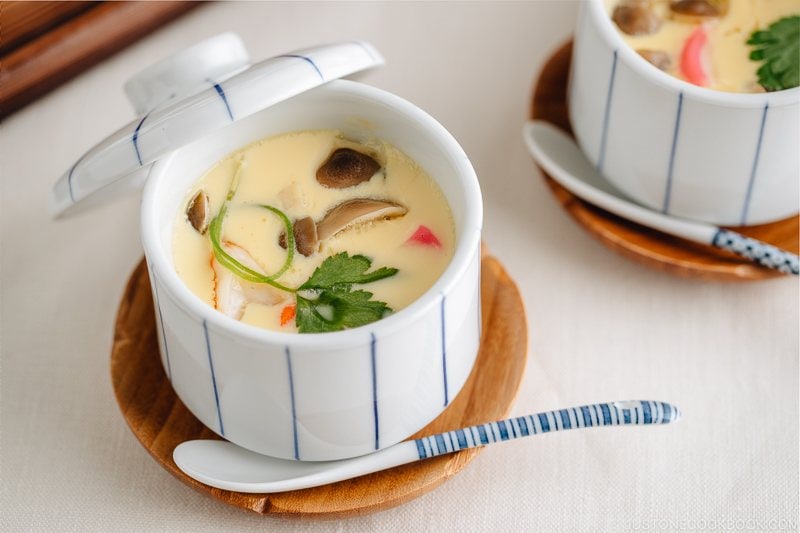
Instant Pot Chawanmushi
4.3
(16)
Your folders
Your folders
Prep Time: 20 minutes
Cook Time: 20 minutes
Total: 40 minutes
Servings: 5
Author : Namiko Chen

Ingredients
Export 11 ingredients for grocery delivery
Instructions
Step 1
Gather all the ingredients. Make dashi if you don’t have it around already and let it cool to room temperature (you can place the pot with dashi in it over a bowl of iced water).
Step 2
Cut the chicken thigh into slanted, smaller bite-sized pieces. I use “Sogigiri” Japanese cutting technique to create more surface so it will cook faster.
Step 3
Put chicken pieces and shrimp each in a bowl and add 1 Tbsp sake to each bowl. This is to remove any unwanted smell from the chicken and shrimp.
Step 4
Cut the carrot into ¼ inch slices. The next step is optional, but you can cut out the carrot slice into flower shape by using a vegetable cutter or use "Nejiri Ume" Japanese cutting technique.
Step 5
Make a knot at the stem of mitsuba.
Step 6
Cut and discard the bottom end of shimeji mushrooms and slice kamaboko fish cake into thin slices.
Step 7
It’s best to use a kitchen scale but if you don’t have one, use a liquid measuring cup. Crack eggs in a large bowl on a kitchen scale (or in the liquid measuring cup). My 3 eggs are 153 grams or 153 ml. You will need to multiply that number by 2.5 (Read the blog post why we multiply by 2.5). 153 x 2.5= Prepare 382 grams (or ml) dashi.
Step 8
Transfer the eggs into a large bowl that can fit dashi and seasonings and whisk the eggs.
Step 9
Add dashi (382 g/ml), 1 tsp mirin, 1 tsp usukuchi soy sauce (or regular soy sauce), and ½ tsp kosher salt. Whisk all together.
Step 10
Pass the egg mixture through a strainer/sieve into a liquid measuring cup (for easy pouring later on).
Step 11
Place the ingredients in each chawanmushi cup or ramekin. You want to show the colorful ingredients on top, so put the non-colorful ingredients like chicken on the bottom. Put more colorful or unique shape ingredients toward the top.
Step 12
Evenly distribute the egg mixture into chawanmushi cups. Place the mitsuba on top.
Step 13
Cover the chawanmushi cups with lids or wrap with a sheet of aluminum foil (if you are going to stack one on top of another).
Step 14
Fill the instant pot with 1 cup water. Set the steamer rack in place.
Step 15
Put the chawanmushi cups inside. The 5th chawanmushi cup goes on top of the 4 cups.
Step 16
Close the lid and click STEAM, make sure it’s LOW pressure and set the timer for zero (minute.
Step 17
It will take about 10 minutes to reach the optimal pressure. Then beep for 0 minute. Then it will naturally release. Set your own timer for 10 minutes natural release.
Step 18
At 10 minutes alarm, open the lid and take out one chawanmushi cup and go to the next step. If the lid doesn’t open, then it means the pressure hasn’t fully released yet. Prepare a kitchen towel and turn the nozzle to release pressure. Only a little bit of steam should be left, so don’t be scared. Once the pressure has released, you can open the lid.
Step 19
Open the chawanmushi cup lid (or aluminum foil) and insert a skewer to see if the egg custard is fully cooked. If the custard look set and there is no liquid coming out, it is fully cooked.
Step 20
If the chawanmushi is not fully cooked yet (most likely your container is bigger than my chawanmushi cups OR you must have used a colder egg mixture or ingredients), repeat the steam process, and release the air pressure manually. Remember, the egg mixture will continue to cook through from pre- and after- pressure cooking time.
Step 21
Place the chawanmushi lid on and serve hot with a small spoon.