Instant Pot Eggnog Cheesecake
5.0
(4)
Your folders
Your folders
Prep Time: 30 minutes
Cook Time: 37 minutes
Total: 92 minutes
Servings: 8
Cost: $4.73 /serving
Author : Sandy Clifton
Ingredients
Export 11 ingredients for grocery delivery
Instructions
Step 1
Use a 7 inch cheesecake pan (I use a 7” Fat Daddio's Push Pan, but you can use a springform pan as well. Whatever will fit comfortably in your pressure cooker).***
Step 2
Spray the pan with baking spray. If you have parchment paper, cut a piece to fit the bottom of your pan and spray that too (or use Worthy Parchment Liners.
Step 3
Put 1 1/2 cups of water in the inner liner of the pressure cooker.
Step 4
Put the trivet in the pot as well.
Step 5
Usually made with aluminum foil, used to get the cheesecake in and out of the pot easily.
Step 6
Fold a 28” length of foil along the long end 3 times. You will end up with a sling that is 28” x 3”
Step 7
Place the cookies and sugar into a food processor.
Step 8
Pulse several times until the cookies turn into fine crumbs.
Step 9
Add the melted butter and pulse several times to combine and soften the crumbs. You may need to scrape the bowl of the food processor and pulse a few more times.
Step 10
Pour crust mixture into your prepared pan and use your fingers or the bottom of a small glass to press the mixture into place (I now use a Pastry Tamper). Cover the entire bottom of the pan and come up the sides a little. You do not have to come all the way up the sides. You want the crust to be about 1/4” thick or so.
Step 11
Put the pan in the freezer to chill and firm up while you prepare the cheesecake filling.
Step 12
Clean the crust residue out of the food processor.
Step 13
Add the room temperature cream cheese and sugar to food processor and process until smooth and creamy.
Step 14
Add the eggnog, corn starch, vanilla, rum flavoring, cinnamon, and nutmeg.
Step 15
Pulse several times until well combined and creamy.
Step 16
Add the room temperature eggs last. Pulse just a few short bursts until combined. If you whip the eggs too much the cheesecake will puff up and won’t have the right consistency.
Step 17
Take the crust from the freezer and pour the filling into the pan.
Step 18
Cover the pan with a paper towel, then with a piece of foil. Crimp the edges around the pan so it stays taut and secure.
Step 19
Lay the sling out and set the pan on it, centered. Gather up the two ends and very carefully lift the pan and set it in the pressure cooker, leaving the sling with it. Just fold over the two ends of the sling on top of the pan.
Step 20
Close the lid of the pressure cooker and set the steam release knob to the Sealing position.
Step 21
Press the Manual (or Pressure Cook) button and then the +/- button to choose 37 minutes. High Pressure.
Step 22
When cook cycle ends, let the cooker naturally release pressure for 15 minutes. Then manually release any remaining pressure.
Step 23
When the pin drops and it is safe to open the lid, do so carefully, facing away from you.
Step 24
Gather up the two ends of the sling and VERY carefully lift the cheesecake pan out of the cooker and onto a cooling rack.
Step 25
Leave covered for 10 minutes, then carefully peel off the foil/paper towel.
Step 26
Cheesecake is done when it jiggles just a little when the pan is shook. You don't want waves. It will firm up in the fridge. If it looks to liquid, cover it back up and cook for another 5 minutes, and let naturally release for 15 minutes.
Step 27
Leave on cooling rack until cool enough to put in the fridge.
Step 28
Put the cheesecake, still in the pan, into the fridge to chill for at least 4 hours before serving. I prefer to make my cheesecake in the evening and let it cool overnight.
Step 29
Remove from the push pan by setting the pan on top of a large can and pushing the pan straight down. The pan will slide down and the bottom with the cheesecake on it will stay atop the can. Slide cheesecake onto a serving dish.
Step 30
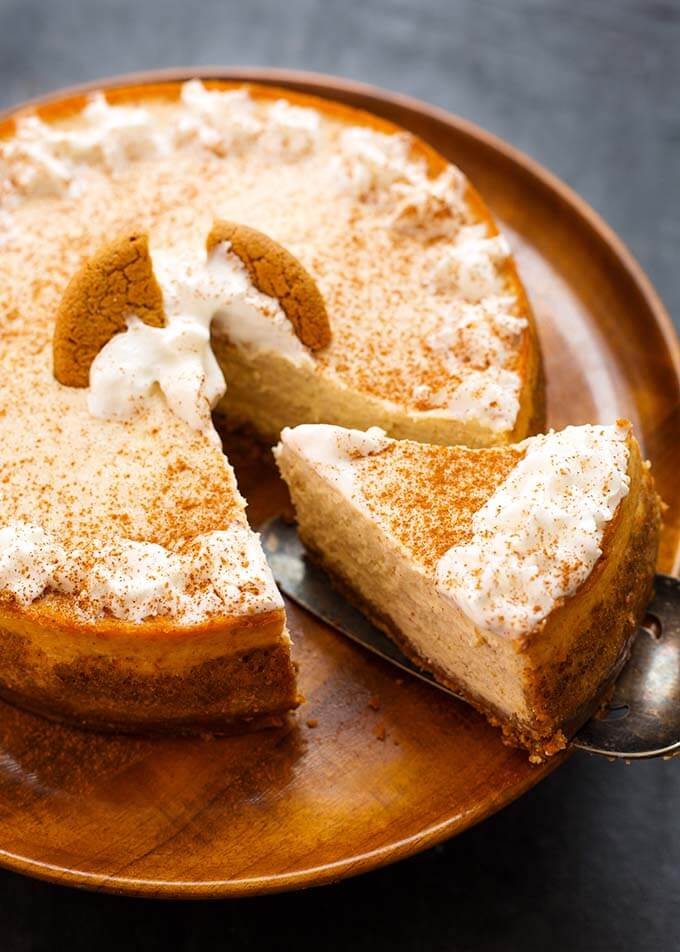
Serve as is, which is very delicious, or top with whipped cream and a dusting of cinnamon.
Top similar recipes
Curated for youYour folders
 105 views
Instant Pot Eggnog
idonthavetimeforthat.com
5.0
(1)
8 minutes
Your folders
 332 views
Eggnog Cheesecake
lifeloveandsugar.com
5.0
(22)
3 hours
Your folders
 326 views
Eggnog Cheesecake
tasteofhome.com
4.7
(19)
45 minutes
Your folders

 562 views
Eggnog Cheesecake
lifeloveandsugar.com
5.0
(20)
3 hours
Your folders

 232 views
Eggnog Cheesecake
tasteofhome.com
4.7
(23)
45 minutes
Your folders
 448 views
Eggnog Cheesecake
bakedbyanintrovert.com
4.4
(48)
2 hours, 10 minutes
Your folders

 388 views
Eggnog Cheesecake
foodnetwork.com
3.3
(4)
50 minutes
Your folders
 174 views
Eggnog Cheesecake
orwhateveryoudo.com
4.5
(2)
1 hours
Your folders
 258 views
Eggnog Cheesecake
kingarthurbaking.com
4.8
(4)
1 hours, 5 minutes
Your folders

 123 views
Eggnog Cheesecake
butterwithasideofbread.com
5.0
(2)
165 minutes
Your folders
 431 views
Instant Pot Cheesecake
savorytooth.com
5.0
(47)
30 minutes
Your folders

 513 views
Instant Pot Cheesecake
onegoodthingbyjillee.com
4.8
(6)
25 minutes
Your folders
 440 views
Instant Pot Cheesecake
mybakingaddiction.com
4.4
(241)
35 minutes
Your folders
 368 views
Instant Pot Cheesecake
delish.com
4.7
(9)
Your folders
 204 views
Instant Pot Cheesecake
crunchycreamysweet.com
4.9
(51)
30 minutes
Your folders
 77 views
Instant Pot Cheesecake
crunchycreamysweet.com
Your folders

 250 views
Eggnog Cheesecake Iii
allrecipes.com
4.6
(533)
55 minutes
Your folders
 67 views
Eggnog Holiday Cheesecake
chefjeanpierre.com
4.7
(18)
Your folders
 136 views
Eggnog Cheesecake Cake
shugarysweets.com
5.0
(1)
90 minutes