Mongolian Chicken Recipe
4.5
(4)
Your folders
Your folders
Prep Time: 20 minutes
Cook Time: 10 minutes
Servings: 3
Author : Anna Lee
Ingredients
Export 11 ingredients for grocery delivery
Instructions
Step 1
To make the chicken breast more tender, always tap the chicken breast lightly against the grain direction with the back of the knife. (Note 1).
Step 2
Cut the chicken into bite-sized chunks. Season with soy sauce, beaten egg, water, and rice wine in a bowl. Mix well and marinate for 10 minutes (you can also leave it overnight). (Note 2).
Step 3
Add 2 tablespoons of cornstarch to the chicken and mix well.
Step 4
Put 4 tablespoons of cornstarch on the plate. Dip the chicken breasts in the cornstarch on both sides and separate them one by one, don't connect them, but let them get wet for pan fry. (Note 3).
Step 5
For the sauce, whisk together brown sugar, soy sauce, cornstarch, and water in a small bowl. Set aside.
Step 6
Prepare vegetables - wash and chop scallions into 2" inch pieces, mince ginger and garlic. Set aside.
Step 7
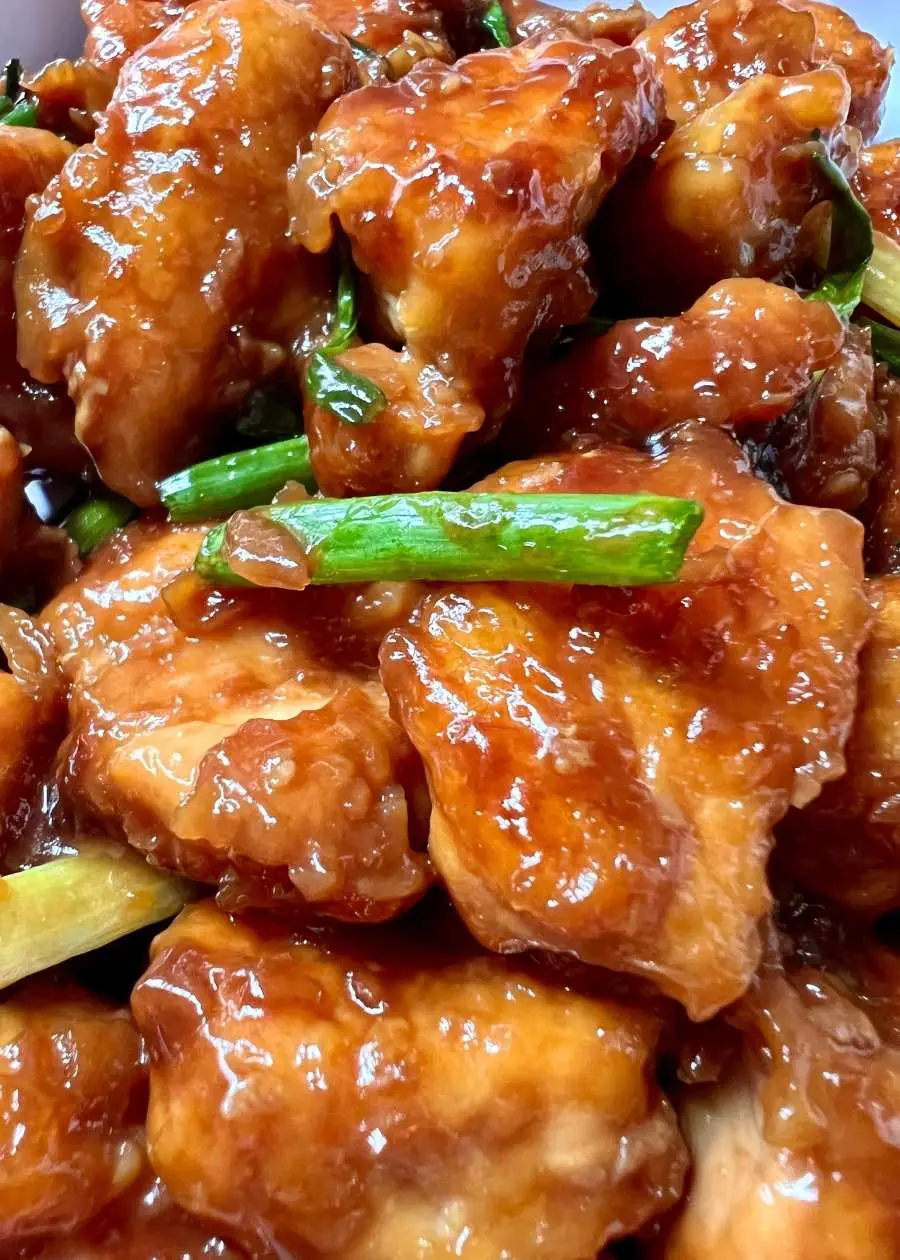
In a large wok or skillet, heat 1 tablespoon of canola oil over medium heat. Put the chicken in it in a single layer. When you put the chicken in, dip it in the oil in the pan to crisp it up. Don't flip it, but wait for 3 to 4 minutes before flipping the other side. Fry it until it's golden brown and cooked through, about 6-8 minutes. Remove it from the pan. (Note 4).
Step 8
Fry the aromatics and add the sauce - In the same pan, add the remaining tablespoon of oil, the ginger, and the garlic and fry them for 10-15 seconds. Add the sauce to the pan and let it simmer for 1 minute.
Step 9
Return the chicken - Add the chicken back in and let the sauce thicken for 20-30 seconds. The cornstarch we used on the chicken should thicken the sauce. If you find that it doesn't thicken enough, add 1 tablespoon of cornstarch to 1 tablespoon of cold water and stir to dissolve the cornstarch and add it to the pan.
Step 10
If you want the chicken breast crispy, you don't have to toss it in the Mongolian sauce for too long, about 1 minute is enough.
Step 11
Add the scallions - stir to combine and cook for the last 20-30 seconds
Step 12
Serve - immediately with a side dish of rice.