My Best Banana Cake Recipe
Your folders
Your folders
Prep Time: 150 minutes
Cook Time: 20 minutes
Total: 170 minutes
Servings: 12
Ingredients
Export 18 ingredients for grocery delivery
Instructions
Step 1
If cleaning a fresh pineapple, cut the top and bottom off. Stand the pineapple up and cut the sides off to expose the flesh. Cut the flesh off on each side. Cut the pineapple into 1 to 1 /2 inch chunks.
Step 2
Place the butter, golden syrup or corn syrup and the brown sugar in a skillet large enough to hold the pineapple in a single layer. Bring the ingredients to a hard boil.
Step 3
Add the pineapple, stirring to coat all of it. Over medium heat, continue to boil the liquid ingredients to reduce them until they just coat the fruit. A spoon run through the pineapple should show the mixture separated and not coming together. Monitor the heat so the pineapple and sauce do not burn.
Step 4
Remove the caramelized pineapple from the pan and cool it. Place in the bowl of a processor and pulse 3 or 4 times. Leave little pieces of pineapple in it. Refrigerate for up to a week. There should be about 2 cups of the filling.
Step 5
Preheat the oven to 350°F. Line two 9x2 inch round cake pans with parchment paper. Spray only the middle of the paper. Do not spray the sides. See my post on How to Bake a Flat Cake Layer.
Step 6
Combine the flour, baking soda, baking powder and salt. Whisk to combine. Set aside.
Step 7
Break the bananas up in and place them in the bowl of a processor. Add the buttermilk and oil. Process until smooth, scraping down if necessary.
Step 8
Cream the butter and sugar in the bowl of a mixer until light and fluffy. Add the eggs, one at a time. The mixture may curdle. It will be corrected in the next step.
Step 9
Alternate adding the flour and banana puree starting and ending with the flour. I generally use 3 additions of flour and 2 of banana puree. Mix on low completely each time.
Step 10
Divide among the two cake pans (about 475 grams per pan).
Step 11
Bake for 20 to 22 minutes until a cake tester comes out clean or the center springs back when lightly touched. The layers should not come away from the sides. They are over baked at that point. The layers will be an even medium golden brown.
Step 12
Cool completely in the pans. To release, use a small, flexible, metal spatula and go around the edge of the pan. Keep the spatula to the edge of the pan and not the cake. Turn the layers out.
Step 13
If using immediately, it will be easier to assemble if they are frozen just until firm. Do not let them freeze hard. If using from frozen, thaw jut until firm. Do not use frozen hard.
Step 14
Wash the strawberries and dry them. Cut them into medium size pieces. Set aside.
Step 15
Whisk the Instant Clearjel and sugar together in a large bowl. Whisk in the water. If using the food coloring, add it now. Add the strawberries and stir to coat all of them. Set aside or place in a covered container and refrigerate for use the next day.
Step 16
Combine the whipped cream and powdered sugar in the bowl of a mixer. Beat until stiff peaks just start to form.
Step 17
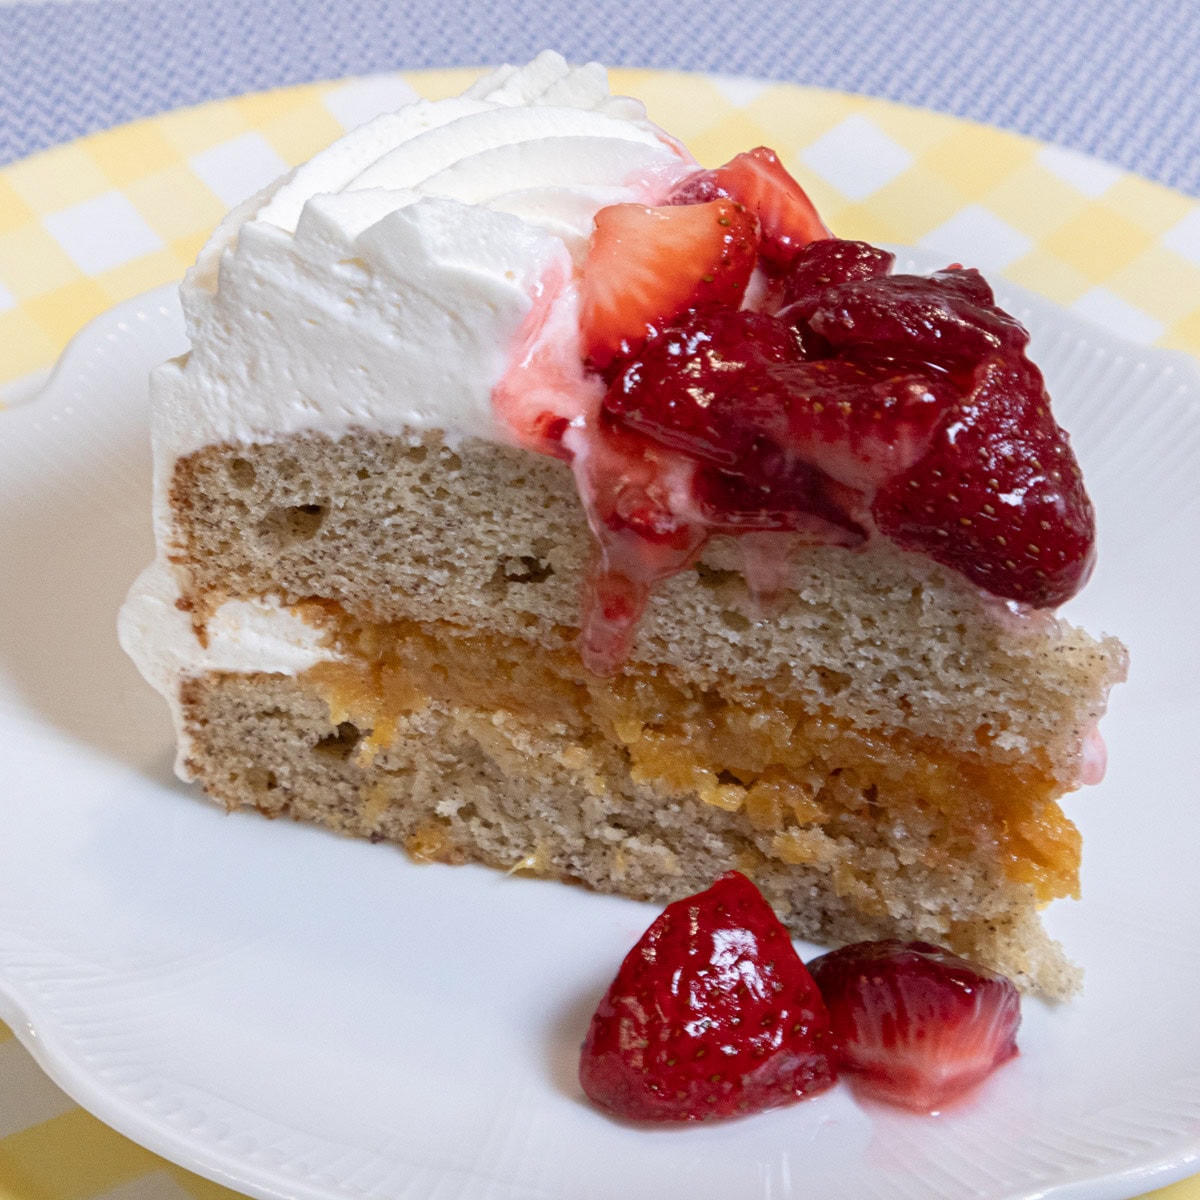
Place about 3/4 of the caramelized filling in the middle of the bottom layer of cake. Spread to about 1" in from the edge of the cake layer. The filling should be about 3/4" thick. If it is thinner use the remainder of the filling.
Step 18
Place the remaining layer of cake on top. Frost the sides and top of the cake with about 2/3 of the whipped cream. Make sure to force the whipped cream into the open are of the side of the cake.
Step 19
Make a channel on the bottom of the cake by placing a metal spatula on the bottom of the cake board and removing about 1/8" of the whipped cream. This will make it easier to transfer the cake to a serving plate.
Step 20
Fit a piping bag with a #5 open star tip and pipe a wreath around the edge of the cake extending in about 2" in from the edge. Refrigerate overnight or at least 4 to 6 hours before serving.
Step 21
About 2 hours before serving, fill the center of the cake with the strawberry topping. This will keep it from bleeding into the whipped cream. Refrigerate until serving.
Step 22
This cake cuts beautifully when cold. Cut with a serrated knife run under really hot water and dried immediately. Rinse the knife and reheat for each cut.
Step 23
Leftover cake will hold in the refrigerator for a day or two. To keep the cake from drying out, fold a piece of plastic wrap a little higher than the cake and long enough to be pressed against the cut edges.