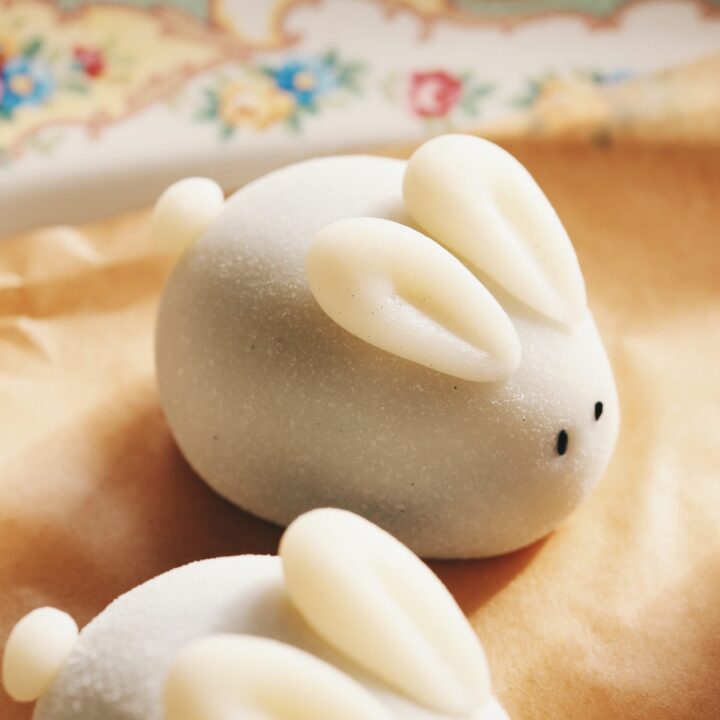
Rabbit Black Sesame Snow Skin Mooncake
4.6
(9)
Your folders
Your folders
Prep Time: 1 hours
Cook Time: 25 minutes
Total: 1 hours, 25 minutes
Servings: 10
Author : Angela Chung
Ingredients
Export 11 ingredients for grocery delivery
Instructions
Step 1
Prepare a large pot (or use a steamer if you have one) with a couple inches of hot water and a steamer rack. Make sure the water doesn't reach the very top of the rack. Cover and bring to a boil.
Step 2
Meanwhile, In a medium bowl, combine all the snow skin ingredients and whisk until well combined. Pour mixture through a fine mesh sieve into a shallow bowl to get rid of any lumps.
Step 3
Carefully place bowl into the pot, on top of the steamer rack, cover bowl completely with an inverted plate. Cover pot with lid, then lower the heat to medium-low and steam for 25 minutes.
Step 4
Carefully remove and uncover the cooked snow skin. While it's still hot, using a silicone spatula to scrape the snow skin from the bowl, and fold it into itself, kneading it. It will be a little oily or hard to knead together at first, but it will slowly become one homogenous dough as you keep going.
Step 5
Wearing food safe gloves (this ensures that the dough doesn't stick to your hands), knead the warm dough on a clean surface for 5 minutes, until smooth and elastic. Immediately wrap tightly in plastic wrap and let chill for at least 2 hours in the fridge. I like making mine the night before and chilling it overnight.
Step 6
Place 1/2 cup glutinous rice flour onto a small to medium frying pan over low heat. Constantly stir the flour around and cook for about 5-7 minutes. Remove from heat and set flour aside in a small bowl.
Step 7
If your black sesame isn't already toasted, place black sesame in a medium frying pan over medium low heat. Cook, stirring constantly to prevent burning for about 7-10 minutes, until you can hear some popping, or they start to smell very nutty and aromartic. Remove from heat and let cool slightly.
Step 8
Place slightly cooled toasted black sesame seeds into a high speed blender or food processor. Add sugar and coconut oil and blend, scraping down the sides as you go. It will look like it won't blend much at first, but as you keep going, the black sesame seeds will become almost like a thick runny lava consistency.
Step 9
Add the cooked glutinous rice flour and honey, and blend to combine. It will quickly come together in large clumps. Scrape everything into a medium bowl and fold with a silicone spatula a few times to make sure everything is combined well.
Step 10
With a spoon, scoop out and measure 25g portions of the filling, roll each into a little ball, and place onto a parchment lined plate. (At this point, you can use filling right away OR you can cover with plastic wrap and let chill in the fridge until ready to assemble)
Step 11
When ready to assemble, place a small plate over your scale and measure out 20g of the snow skin for the rabbit body, plus 3g that will be split for the ears and tail. Make sure to wrap up the remaining snow skin as to not let it dry out.
Step 12
Roll the 20g piece into a tight ball (if too sticky, wear food safe gloves). Dipping your fingers in a bit of the cooked glutinous flour, start flattening the snow skin ball all around until it's about a 2.5 inch circle (don't have to be exact!). Place a black sesame ball in the center, and with one hand cupping the bottom of the snow skin, use the other hand to gently push and wrap the snow skin up and around the ball. Be gentle and don't tear the snow skin. Keep smoothing the dough up to meet each other and lightly pinch to seal it. Dip the whole ball into a bit of cooked glutinous rice flour and roll gently to form a nice ball.
Step 13
Place the ball seam side down on work surface. With your fingers, gently pat and shape it roughly into the shape of a rabbit (refer to photos above). It's basically more of a slight pear shape.
Step 14
Taking the 3g portion of snow skin, rip off a small bit for the round tail and two equal pieces for the ears. For the ears, first roll the dough into a ball, then into a fat cylinder. Pinch one end slightly to taper it and pat the other end into a round ear shape.
Step 15
Using either a small paint brush or your finger, brush a tiny amount of water onto one side of the tail, gently press it against the back of the rabbit body, holding it there for a second to bind.
Step 16
Brush a little water where the ears will go, then gently pat on the ears. Using a chopstick, create an indent in the middle of each ear, slightly pushing it in to secure it at the same time.
Step 17
Dip the point end of the chopstick into a little water (tapping off any excess) to stick a sesame seed on the end of the chopstick. Gently press the sesame seed into the face for the rabbit's eye. Repeat for other eye.
Step 18
Enjoy right away! Store extras in an airtight container and place in the fridge. WIll be good for up to two days before skin becomes a little hardened.