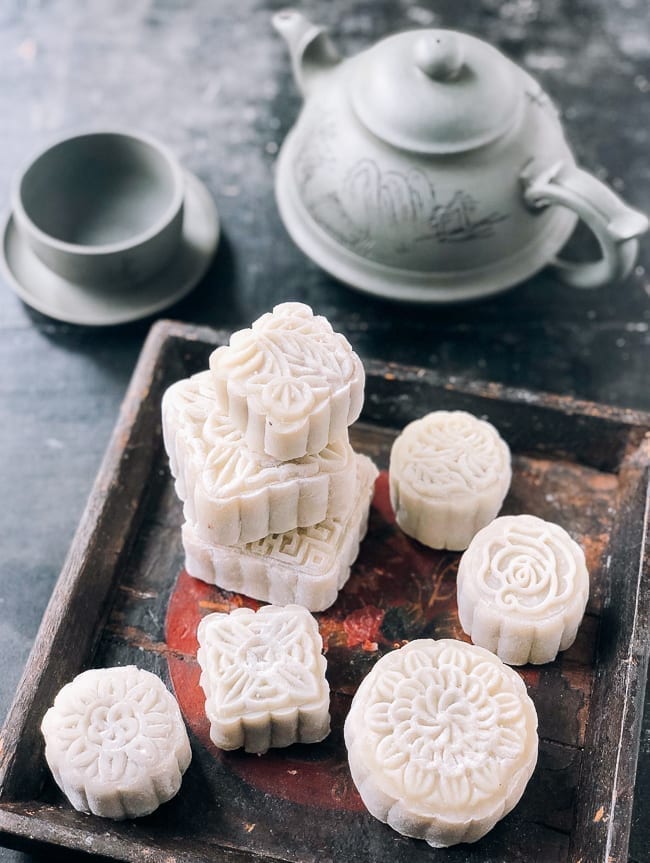
Snow Skin Mooncakes
5.0
(4)
Your folders
Your folders
Prep Time: 80 minutes
Cook Time: 40 minutes
Total: 240 minutes
Servings: 8
Author : Judy
Ingredients
Export 6 ingredients for grocery delivery
Instructions
Step 1
Note: It’s best to prepare your choice of filling a day in advance and keep it refrigerated.
Step 2
In a large mixing bowl, combine the powdered sugar, milk, and oil. Sift in 50g glutinous (sweet) rice flour, 35g rice flour, and 35g wheat starch. Stir and mix well until there are no lumps.
Step 3
Pour the dough mixture into a heat-proof bowl that will fit in your steamer. Cover it with clear plastic wrap, and let it rest on the counter for 30 minutes.
Step 4
Prepare a steamer by filling it with enough water to steam on high heat for 25 minutes. Place the rested dough (still in the heatproof bowl) into your steamer while the water in the steamer is still cold. Keep the plastic wrap on the dough as it steams to protect it from condensation. Do keep the plastic wrap away from the hot sides of the steamer.
Step 5
Place the steamer over high heat, cover, and steam for 25 minutes. The dough is cooked once it has turned from fully opaque to fully translucent. A little oil floating to the top is normal. If the dough is not completely cooked through, just put the plastic wrap back on and steam for another 5 minutes over high heat.
Step 6
Once the dough is done cooking, carefully stir it to gradually cool it down. Once cool enough to handle, put on your food prep gloves, and knead the dough for a few minutes to ensure the oil is well absorbed and the dough is smooth. Wrap the dough in plastic wrap, and chill in the refrigerator for 1-2 hours.
Step 7
Cook the remaining 25g glutinous (sweet) rice flour in a clean, dry pan over medium low heat for 6-7 minutes, until it turns very lightly brown. Stir often to avoid burning, and set aside to cool completely. You’ll use this flour for dusting.
Step 8
You should have about 400g of dough. The ideal dough to filling ratio is about 1:For a 50g mooncake mold, you’ll need 25g dough and 25g filling. Put on your food prep gloves, and weigh/divide the filling into portions that correspond to the size of your mooncake mold. Roll each portion of filling into a ball. Repeat the same step with the dough after chilling. A plastic dough cutter works well (it doesn’t stick to the dough), or you can just rip the dough apart with your gloved hands. The dough should be pliable and very easy to work with.
Step 9
Lay a piece of clear plastic wrap on your work surface to prevent sticking. Take each dough ball, and press it into a round disc with your palm. For a 50g mooncake, the circle should be no bigger than 3 inches (7.5 cm) in diameter. For a 100g mooncake, the skin should be no bigger than 4 inches (10 cm) in diameter. If you’d like to use a rolling pin, the dough must be between two layers of plastic wrap to avoid sticking.
Step 10
Place a ball of filling in the center of the dough circle, and carefully lift the whole thing up and turn it upside down. Gently press out the air bubbles around the filling ball.
Step 11
Turn the opening face up, and slowly press the dough together to close the opening, keeping the dough as even as possible all around.
Step 12
Dust the inside of the mooncake mold VERY well by brushing all the nooks and crannies with the cooked glutinous rice flour (AKA sweet rice flour). Mooncake molds have intricate designs where dough can get stuck, so it pays to make sure it’s well-floured. Shake off any excess flour, and carefully place the ball inside the mold. Do not force it in. If necessary, re-shape the mooncake ball so it can easily fit into the mold.
Step 13
Flip the mooncake mold so the open side is facing down on the plastic wrap work surface. With slight pressure, gently press down the spring bar on the mold until you feel resistance. Lift the mold, gently press the spring bar (to push the mooncake out of the mold), and carefully guide (and catch) the mooncake out of the mold with your other hand. Continue this process until all the mooncakes are assembled.