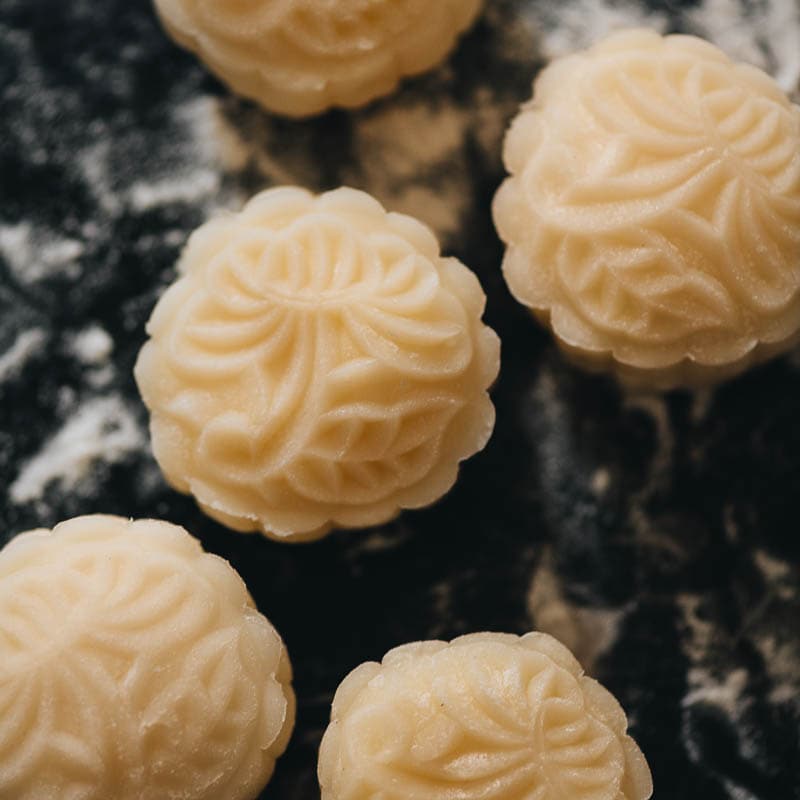
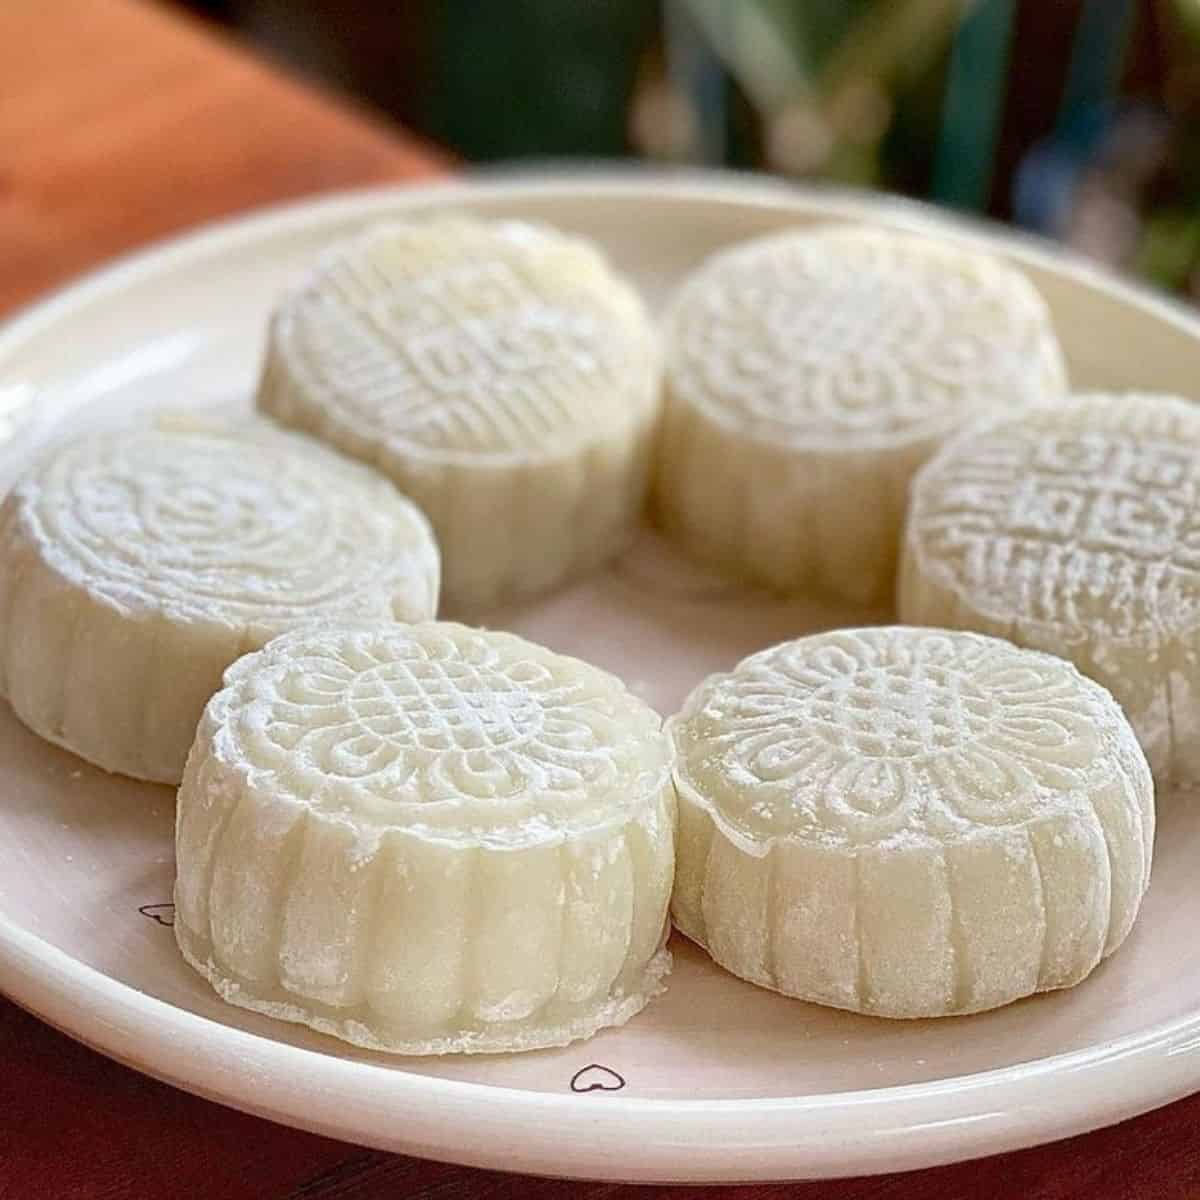
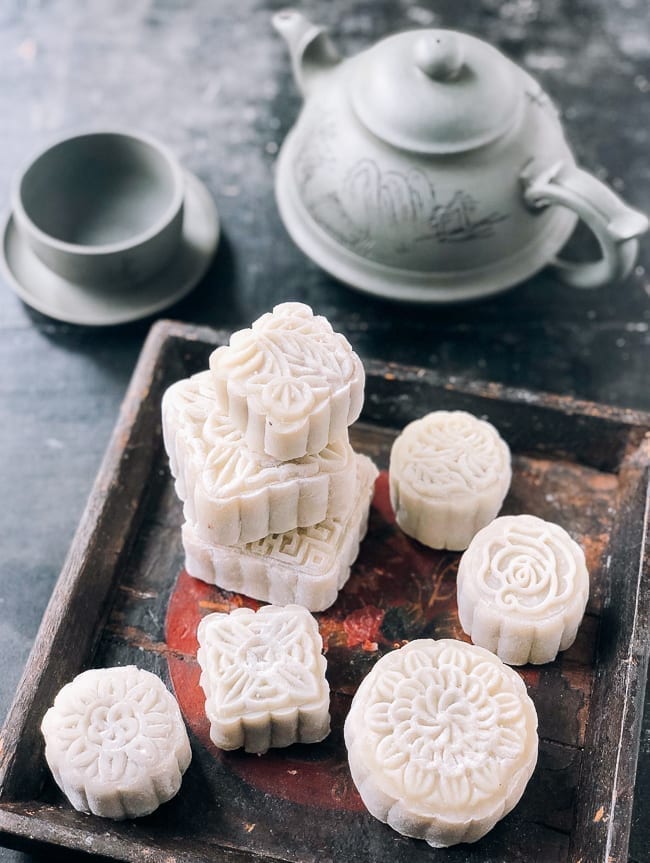
Snow Skin Mooncake with Custard Filling (冰皮月饼)
4.9
(8)
Your folders
Your folders
Prep Time: 120 minutes
Cook Time: 30 minutes
Total: 330 minutes
Servings: 25
Author : Maggie Zhu & Lilja Walter
Ingredients
Export 12 ingredients for grocery delivery
Instructions
Step 1
Mix the cornstarch, all-purpose flour, and half of the sugar together in a small bowl.
Step 2
Place the egg yolks in a large bowl. Stir a few times to mix the yolks.
Step 3
Add the milk and the remaining half of the sugar into a small saucepan. Heat over medium heat. Stir occasionally to dissolve the sugar completely. Cook until it reaches about 120 F/ 49 C (no more than 150 F / 65 C). You might see a few bubbles here and there. If the milk starts foaming, it’s too hot.
Step 4
While the milk starts to get warm, add the dry ingredients (from step into the bowl with the egg yolks. Whisk until it forms an even paste. Do not add the dry ingredients too early, because the sugar will change the texture of the eggs.
Step 5
Add the warm milk into the egg yolk mixture, about 1/4 cup at a time. Whisk constantly until the milk is fully incorporated into the paste. Continue to add more milk a 1/4 cup at a time and keep stirring, until it forms a thin, smooth mixture and all the milk is added.
Step 6
Return the mixture back into the pot (the one you used to heat the milk). Heat over medium heat and stir constantly, until the mixture thickens, 5 minutes or so. Keep cooking and stirring, until you can draw a line on the bottom of the pot using a spatula. (Note, the custard will start to thicken suddenly, like a switch was flipped. So you should keep a close eye on it.)
Step 7
Remove the pot from the stove immediately. Add the butter and vanilla extract. Stir to mix well.
Step 8
Line a large deep plate with plastic wrap. Place a large mesh strainer on top.
Step 9
Pour the custard into the lined plate over the strainer to smooth out the texture. Use a spatula to press the strainer if any lumps remain.
Step 10
Cover the custard with plastic wrap. Press the wrap against the custard, so it won’t form a skin once it’s chilled.
Step 11
Chill the custard in the fridge until it’s cooled completely, 2 hours or so. Or in the freezer for 30 mins.
Step 12
Prepare a large bowl that can fit into your steamer. Place a large strainer on top.
Step 13
In another medium-sized bowl, add the glutinous rice flour, rice flour, and cornstarch. Mix well with a fork.
Step 14
Line a large mesh strainer over the bowl and sift the confectioner's sugar through it. Use your fingers or a spoon to press the sugar through if any lumps exist.
Step 15
Add the milk, oil, and vanilla extract into a small bowl. Stir to mix well.
Step 16
Use your fork to form a hole in the middle of the flour. Add 2 to 3 tablespoons of the milk mixture at a time. Stir until the liquid is incorporated into the flour completely. Repeat the process until it forms a very runny batter.
Step 17
Pour the mixture into the large bowl (you prepared in step over the strainer. Press the lumps using a spoon. Once strained, the mixture will thicken a little bit.
Step 18
Prepare a steamer by pouring 1 inch (2.5 cof water into the steamer pot. Cover and heat over medium-high heat until boiling. Place the bowl with the batter into the steamer rack. Place the rack over the boiling pot. Cover and steam until the batter is cooked completely, 15 to 20 minutes. After 15 minutes, examine the dough by inserting a spoon into the middle. The spoon should come out clean, and the dough should feel very stiff.
Step 19
Once done, remove the lid, and transfer the steaming rack with the bowl onto your kitchen counter to cool off for a few minutes.
Step 20
Fold a kitchen towel a few times and place it on your working surface. Remove the bowl with the dough wearing oven mitts, and transfer the bowl onto the towel.
Step 21
Scrape the dough from the bowl and knead it using a spoon, until it forms a dough ball, 5 minutes or so.
Step 22
Transfer the dough onto a clean surface. Note, do not add any flour onto the surface or dust your hands with it. Knead the dough using your hands until it’s smooth, 5 minutes or so. The dough will soften once done.
Step 23
Wrap the dough with plastic wrap and chill it in the fridge for 30 minutes.
Step 24
You can keep the dough and the custard filling refrigerated for a couple of hours, up to overnight, until ready to assemble. The dough will become a bit stiff if you chill it overnight. If you want the freshest taste, you should assemble the mooncakes the same day you make the dough and filling.
Step 25
Form the custard into balls - Measure 25 grams of filling (about 1 round tablespooand use your hands to press and roll, until it forms a ball. You can wear rubber gloves to help with this process.
Step 26
Transfer the filling balls into a container and cover it with the lid. Chill for another 30 minutes.
Step 27
Form the dough into balls - Measure 25 grams of dough (about 1 round tablespooand use your hands to roll it into a ball. Place the dough balls into a container and cover. Chill in the fridge until the custard is ready to use.
Step 28
Place the dough ball on a clean working surface. Use a rolling pin to roll it into an even, thin, round disc that is about 4” (9 to 10 cin diameter. Carefully remove it from the surface onto your palm.
Step 29
Place a custard ball in the center of the wrapper. Use your other hand to gather the wrapper onto the top of the custard filling. The dough sheet will start to form pleats and create a thicker layer. Try to pinch the extra dough together using your fingers, and pinch off the dough. The process will keep the mooncake skin even and thin, to create a better mouthfeel. Once done, place the mooncake onto a plate, pleated-side-down. Loosely cover it with plastic wrap to prevent them from drying out. Repeat the process to wrap the rest of the mooncakes.
Step 30
Install the pattern plate into the mooncake mold, with the pattern side facing downward. If you’re using the round shape, you can twist the lever of the mold so the pattern plate will snap onto the lever. It’s not required but it makes the process a bit easier.
Step 31
Dust the mooncake with a very thin layer of cornstarch. (*Footnote 1)
Step 32
Carefully place the wrapped mooncake balls into the mold, smooth surface against the pattern plate.
Step 33
Place the mold onto a clean, flat surface. Gently press the lever until the dough is against your table surface. Hold it for at least 30 seconds. It will help the pattern to form. Once done, push the lever to release the mooncake. Repeat the process to mold all the mooncakes.
Step 34
The mooncakes are ready to eat!
Step 35
Transfer the mooncakes into an airtight container. Store them in the fridge for 3 to 4 days. To enjoy the mooncakes with a better texture, transfer them to your kitchen counter and wait for them to return to room temperature. You can eat the chilled mooncakes, but the skin will be a bit stiff.
Step 36
Note, do not freeze the mooncakes. This will change the texture of the custard and make it very grainy.
Top similar recipes
Curated for youYour folders

 178 views
Snow Skin Mooncake - White strawber...
msshiandmrhe.com
40 minutes
Your folders
 237 views
Snow skin mooncake with custard fil...
redhousespice.com
5.0
(13)
25 minutes
Your folders
 27 views
Snow skin mooncake with custard fil...
redhousespice.com
Your folders
26 viewsSnow skin mooncake with custard fil...
redhousespice.com
Your folders
 308 views
Snow skin mooncake - Wikipedia
en.wikipedia.org
Your folders
 161 views
Taro Snow Skin Mooncake
zhangcatherine.com
30 minutes
Your folders
 136 views
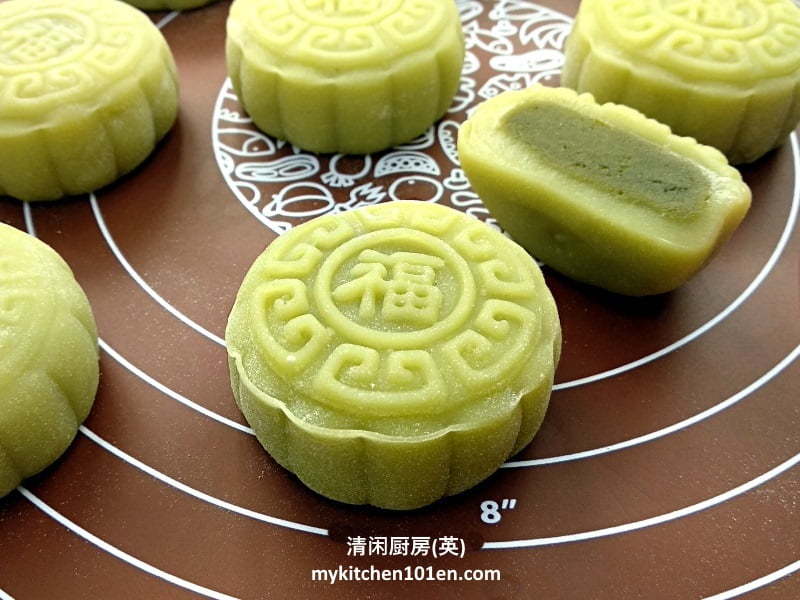
Matcha Mooncake with Snow Skin Reci...
mykitchen101en.com
5.0
(2)
Your folders
 129 views
Easy Snow Skin Mooncake Recipe with...
mochimommy.com
4.0
(3)
15 minutes
Your folders
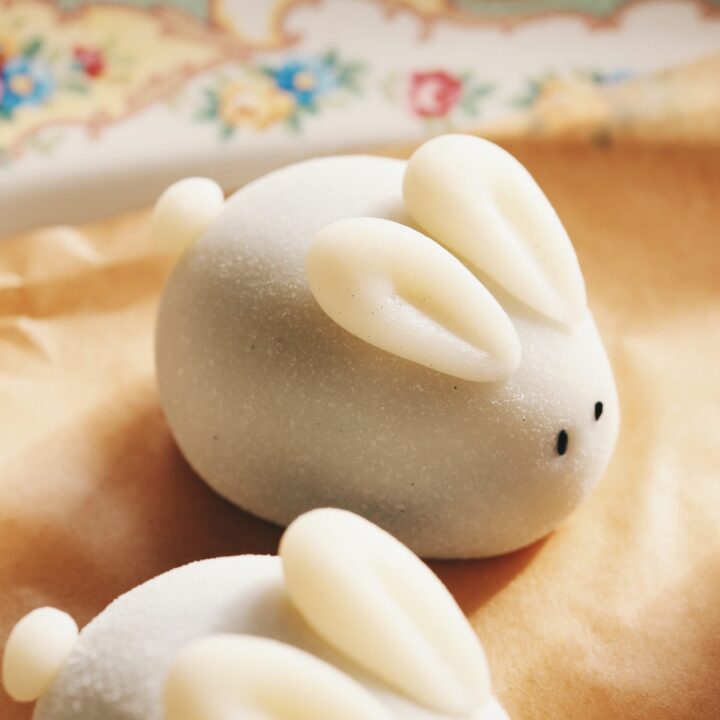 123 views
Rabbit Black Sesame Snow Skin Moonc...
momentsofsugar.com
4.6
(9)
25 minutes
Your folders
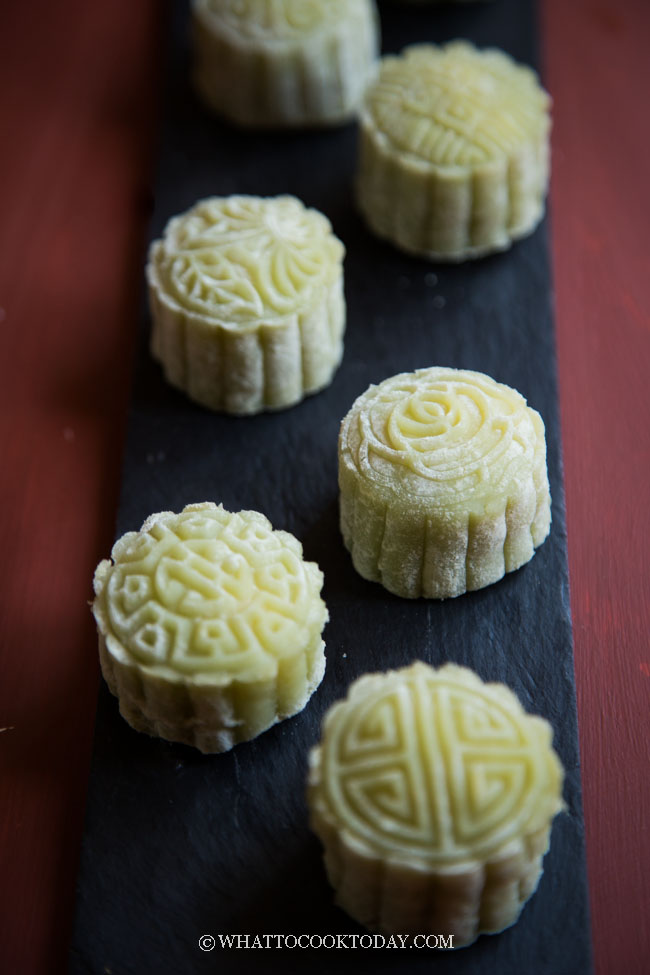 358 views
Easy Pandan Snow Skin Mooncake (冰皮月...
whattocooktoday.com
4.9
(9)
20 minutes
Your folders
 302 views
Snow Skin Mooncakes with Custard Fi...
asweetpantry.com
20 minutes
Your folders
 431 views
Snow Skin Mooncake (Chocolate, Red ...
honestfoodtalks.com
5.0
(18)
120 minutes
Your folders
 132 views
Snow Skin Mooncakes
washingtonpost.com
1 hours, 30 minutes
Your folders
118 viewsSnow Skin Mooncakes
foodnetwork.com
55 minutes
Your folders
 258 views
Snow Skin Mooncakes
thewoksoflife.com
5.0
(4)
40 minutes
Your folders
 252 views
Custard filling
bbcgoodfood.com
10 minutes
Your folders
 174 views
Mochi with Custard Filling
wanderzestblog.com
4.9
(45)
15 minutes
Your folders
 175 views
Homemade Snow Skin Mooncakes
dessertfirstgirl.com
Your folders
 429 views
Strawberry Snow Skin Mooncakes
zhangcatherine.com
30 minutes