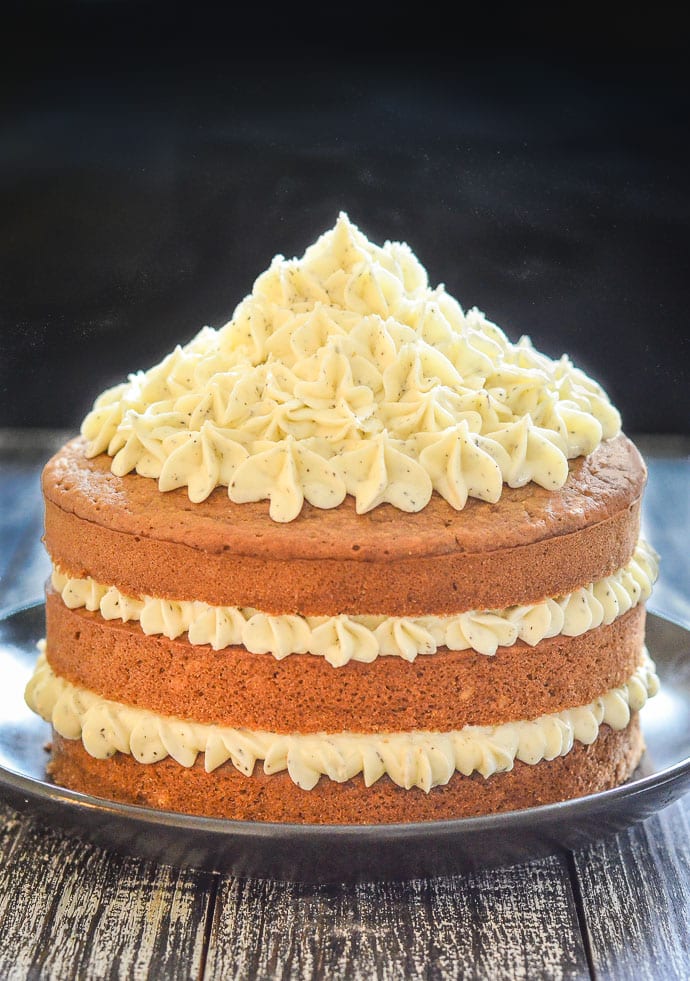
Earl Grey Vegan Cake with Lemon Frosting
4.5
(22)
Your folders
Your folders
Prep Time: 40 minutes
Cook Time: 35 minutes
Total: 75 minutes
Servings: 14
Author : Melanie McDonald
Ingredients
Export 36 ingredients for grocery delivery
Instructions
Step 1
Begin by making the tea. Put the tea bags into a small jug and cover with boiling water. Press the bags with the back of a spoon a few times to squeeze all of that flavour out then let it steep for about 15 mins. Remove the tea bags then measure the tea. You need 1½ cups (360mls) of tea for the 3 layer cake, 1 cup (240ml) of tea for the 2 layer cake and ½ cup (120mls) of tea for the 1 layer cake or 6 muffins. You should have almost exactly that once you remove the bags and measure. They tend to absorb all of the extra water but if it's a bit over, discard the extra or if it's a little less, top it up with a drop more water.
Step 2
Preheat oven to 350°F
Step 3
Grease the required number of 8 inch cake pans then cut a circle of parchment paper and put it into the bottom of each pan. This makes the cake removal once baked super easy. You can place the pan ( or the loose bottom insert) on the parchment paper and draw around it then cut to fit. If making muffins line your tin with muffin liners.
Step 4
Put the brewed tea (it doesn't matter if it's still warm), the milk, the vanilla extract and the vinegar into a large jug and stir to combine.
Step 5
Sift the flour (not essential but it does make the cake slightly lighter) into a bowl and whisk in the salt, baking soda and baking powder.
Step 6
Beat the vegan butter and sugar together until light and fluffy. I used my stand mixer but an electric hand mixer would work well or you can do it by hand.
Step 7
Once fluffy, gradually add the aquafaba while mixing. If the mixture splits a little bit don't worry as it will make no difference to the end result.
Step 8
While mixing on a very low speed, or gently by hand, add the flour mixture to the fluffy sugary butter mixture in 3 three additions, alternating with the milky tea mixture, beginning and ending with the dry ingredients, and mixing each addition just until incorporated. Do not overmix the batter. Just continue until there is no dry flour visible and most of the lumps are out. A few small ones are fine. The batter should be velvety, and slightly thick.
Step 9
Divide the mixture evenly between the cake pans. If you have a kitchen scale you can weigh each tin so they are exactly the same. If not add the same amount of scoops to each tin so that they will all cook for the same amount of time.
Step 10
Bake on the middle shelf of the oven for 32-37 mins or until baked through. To test, insert a toothpick into the centre of the cake. If it comes out clean, it is done. If making muffins bake for 22-25 minutes or until a toothpick inserted comes out clean.
Step 11
Leave the cakes in the pans on a cooling rack for about 5 minutes then remove, peel the baking parchment off the bottoms and return to the cooling rack until completely cool. Do not attempt to frost or assemble if they are even the slightest bit warm.
Step 12
Beat the powdered sugar, butter, salt, lemon juice and the tea leaves (if using) together until soft, fluffy and well combined. Add the powdered sugar gradually to avoid it poofing up into a cloud and scattering everywhere! Once done place in the fridge to firm up before trying to pipe with it and if it gets too soft during piping, return the bowl and the piping bag to the fridge for 10 mins or so to firm up again.
Step 13
Feel free to cut each of the cakes perfectly level before frosting if you like. I personally don't as I don't like to waste anything. If you do level them, I recommend not levelling the top layer if you are decorating it like me as the slightly domed shape helps the height of the frosting towards the middle of the design.
Step 14
Decorate the cakes with the frosting as desired. I used a large open star piping tip to get the pattern on the top and around the edges between the layers. I spread the frosting between each layer with a spatula then piped just around the outside edge before putting the layer of cake on top. On the top I started at the outside and piped all around, gradually moving inwards. Towards the middle I increased the height of the frosting by piping slightly more each time and made the swirls a few layers high. If you don't want to pipe it, just spread it all over evenly with a spatula. You could decorate it with a scattering of lemon zest to add some interest in place of frosting swirls!