Easy Same-Day Pizza Dough
5.0
(1)
Your folders
Your folders
Prep Time: 1 hours, 30 minutes
Cook Time: 14 minutes
Total: 1 hours, 44 minutes
Servings: 2
Cost: $16.88 /serving
Author : Whip & Wander

Ingredients
Export 3 ingredients for grocery delivery
Instructions
Step 1
In a large bowl, combine the warm water, yeast, and sugar and allow to dissolve for 5 minutes. Though instant yeast technically doesn’t require blooming before being added to flour, I like to give this mixture a 5-minute rest time to ensure that the sugar dissolves.
Step 2
Add the flour, salt, and olive oil. Give the mixture a quick and gentle mix by hand until no flour remains. Cover the bowl with a towel and allow to rest for 20 minutes in a warm area. If your kitchen is particularly warm, a 15-minute rest time is sufficient.
Step 3
Once your dough has rested, sprinkle a small amount of flour onto a clean work surface — If using “00” flour in the suggested ratios, I find that I really don’t need much if any. If using one of the alternative flours, I generally lightly dust as a precautionary measure as the flour/water ratio has been adjusted.
Step 4
Turn your dough out onto the work surface and begin to knead the dough by pushing it down and away from you with the heels of your hands. Then turn the dough 90 degrees and fold in half toward you. Continue this motion of pushing the dough down and away from you to stretch the dough with the heels of your hands, turning the dough 90 degrees, and then folding toward you for 10-12 minutes. The resulting dough should be very smooth and hold its shape.
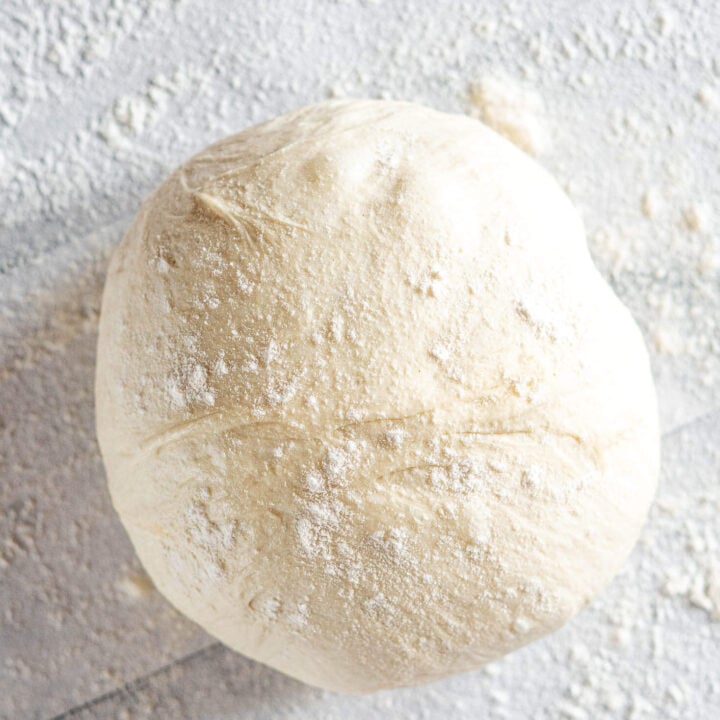
Step 5
Wipe the bowl that you mixed the dough in out so that it is clean of dried dough bits and coat with a light layer of olive oil. Return your dough ball to the bowl, cover it with a towel, and set in a warm place to proof. Depending on the warmth of your proofing area – usually your kitchen – proofing time generally varies from 60 – 90 minutes. I find that in the warm summer months when my kitchen is extra warm, this pizza dough is fully proofed in about 60 minutes and in the colder winter months when my kitchen is on the cooler side, it can take up to 90 minutes or more to reach a proper rise. You can tell that your dough is fully proofed because it will have more than doubled in size and will look nicely domed.
Step 6
Once the dough has risen, use your hand to gently deflate it. Remove the dough from the bowl and divide it into 2 equal pieces and allow to rest while you preheat the oven and gather shaping tools.If only making one pizza, the additional dough ball can be transferred to an airtight freezer bag and placed in the freezer for up to 3 months – or it can be stored in an airtight container in the refrigerator for up to 3 days.
Step 7
Preheat your oven to 500 degrees F / 260 degrees C and set a bakers half sheet (or two, if making both pizzas) to the side.
Step 8
Shape your dough. If you prefer a classic pie-shape with a thicker crust compared to the center of your dough, I suggest hand-stretching your dough. If you prefer your pizza to be an even thickness, I suggest rolling your dough out with a rolling pin.If you are hand-stretching your dough:I like to rub a small amount of olive oil into my hands first; this allows me to shape the dough easier without it ripping accidentally from friction.
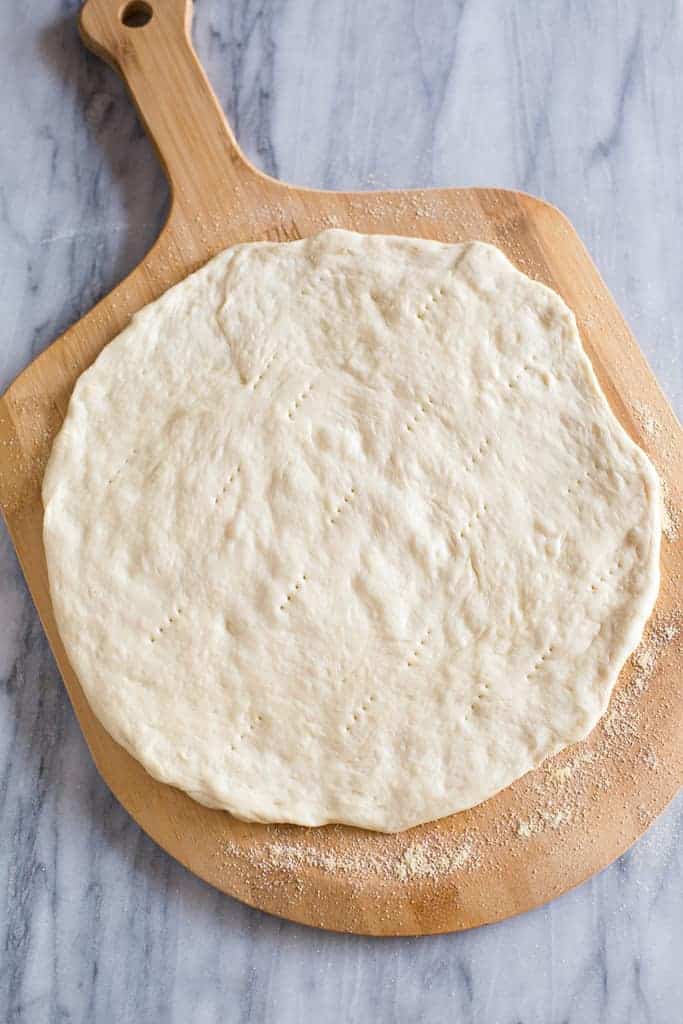
Step 9
Press the dough down with the palm of your hand into a disk shape, then use your fingertips to gently press down on the dough disk, further flattening it.
Step 10
To further extend the dough, I prefer to press one palm on top of one side of the dough and with the other hand lift the alternative side of the dough and gently work the dough outward, pulling very gently with the tips of my oiled fingers (like a very discrete “come hither” motion) to slowly stretch the dough out. Rotate slightly and repeat until the dough is shaped and stretched to your liking. If you find that the dough starts to snap back or is beginning to tear, allow the dough to relax for a minute or two before proceeding again. Transfer your stretched dough to a sheet of parchment paper.
Step 11
If you are using a rolling pin:I prefer to place my dough between two sheets of parchment paper to avoid the dough sticking to my rolling pin, but if you prefer you can also sprinkle a bit of flour over the dough ball as well as wiping some over your rolling pin by hand to prevent sticking instead. Once the dough has been rolled to your preferred size and shape, peel the top layer of parchment paper off (if using). The bottom layer that the dough is resting on can be utilized for your baking sheet. If you find that the dough starts to snap back or is beginning to tear, allow the dough to relax for a minute or two before proceeding again.
Step 12
Transfer your shaped dough to the reserved baking sheet(s). Top as desired and bake for 14-20 minutes or until the crust has reached your preferred level of crispness. I find that pizzas that have have a thinner topping layer take less time to bake, generally around 14-16 minutes. Heavier-topped pizzas generally take a bit longer to bake, around 18-20 minutes.
Top similar recipes
Curated for youYour folders

 227 views
Same-Day Pizza Dough
somuchfoodblog.com
5.0
(1)
10 minutes
Your folders
130 viewsSAME DAY PIZZA DOUGH recipe | Epicu...
epicurious.com
4.0
(5)
Your folders
 18 views
Easy Same Day Pizza Dough Recipe (R...
minoomakesstuff.com
5.0
(3)
25 minutes
Your folders
 179 views
Easy, Same-Day, Sourdough Brioche R...
bubblingstarter.com
5.0
(1)
30 minutes
Your folders
 195 views
Rach's Same-Day Pizza Dough Only Ta...
rachaelrayshow.com
Your folders
 296 views
Same Day Sourdough Recipe
mayaskitchendaydreams.com
4.7
(19)
Your folders
 90 views
Same Day Sourdough Recipe
mayaskitchendaydreams.com
Your folders
 535 views
Same-Day Country Loaf
lionsbread.com
4.0
(1)
50 minutes
Your folders
 336 views
Same-Day Country Loaf
lionsbread.com
Your folders
 80 views
Same Day Sourdough Bread
farmhouseonboone.com
4.7
(283)
40 minutes
Your folders
 154 views
Same Day Sourdough Bread Recipe
cravethegood.com
4.8
(26)
45 minutes
Your folders
 132 views
Same Day Green Goddess Focaccia
mingleseasoning.com
5.0
(1)
3 hours
Your folders
 61 views
Same Day Sourdough Bread Recipe
pantrymama.com
4.1
(143)
45 minutes
Your folders
80 viewssame-day sourdough sandwich bread
lizasfarmhouse.com
Your folders
 89 views
same-day sourdough sandwich bread
lizasfarmhouse.com
5.0
(2)
Your folders
 258 views
Easy Pizza Dough
finecooking.com
4.8
(11)
Your folders
 225 views
Easy Pizza Dough
cravethegood.com
5.0
(1)
30 minutes
Your folders
 966 views
Easy Pizza Dough
tastesbetterfromscratch.com
4.8
(47)
10 minutes
Your folders
 262 views
Easy Pizza Dough
sortedfood.com