Kinako Mochi
5.0
(1)
Your folders
Your folders
Servings: 2
Ingredients
Export 2 ingredients for grocery delivery
Instructions
Step 1
Gather all the ingredients. Choose one of three methods to cook kiri mochi: Using an oven broiler, a frying pan on the stovetop, or a pot on the stovetop.
Step 2
Mix together 4 Tbsp kinako (roasted soybean flour) and 2 Tbsp sugar in a bowl and set aside.
Step 3
Preheat: Place the oven rack in the middle position and preheat the broiler on High, or a toaster oven at 400ºF (200ºC), for 3 minutes.Place the mochi on top of an ungreased oven-safe wire rack set in a baking sheet.Broil: Put them in the oven. Set the timer for 3 minutes.
Step 4
After 3 minutes, flip the mochi. The top should be light golden and slightly puffed.
Step 5
Grill the other side until the top is golden brown, about 3 minutes. When puffed, the mochi should be soft inside.
Step 6
Line a cold frying pan with parchment paper and set the kiri mochi pieces on top.
Step 7
Turn on the heat to medium-low and cover with a lid. Set the timer for 5 minutes. Tip: Covering the pan traps heat and moisture, helping the mochi cook evenly and puff up. Remove the lid as the mochi begins to puff.
Step 8
Occasionally lift the lid to check if the mochi starts to puff. If the bottom develops golden toast marks in one spot (see the picture), press down gently once to encourage even toasting.
Step 9
After 5 minutes, flip them over and grill on the other side for 5–6 minutes, until puffed, browned, and soft inside.
Step 10
Bring a medium pot of water to a boil. Once boiling, reduce the heat to low and add 4 Japanese rice cake (kiri mochi) to the pot. Gently simmer the mochi for 2 minutes, turning them occasionally with a spoon for even cooking.
Step 11
When the mochi is soft to its center, promptly transfer it to the bowl with the kinako mixture from the pot. Dredge the hot mochi completely in the sweetened kinako, generously coating it on all sides. (Skip the next step "To Flavor the Mochi.")
Step 12
Quickly dip the mochi in hot water, then coat it generously on all sides with sweetened kinako.
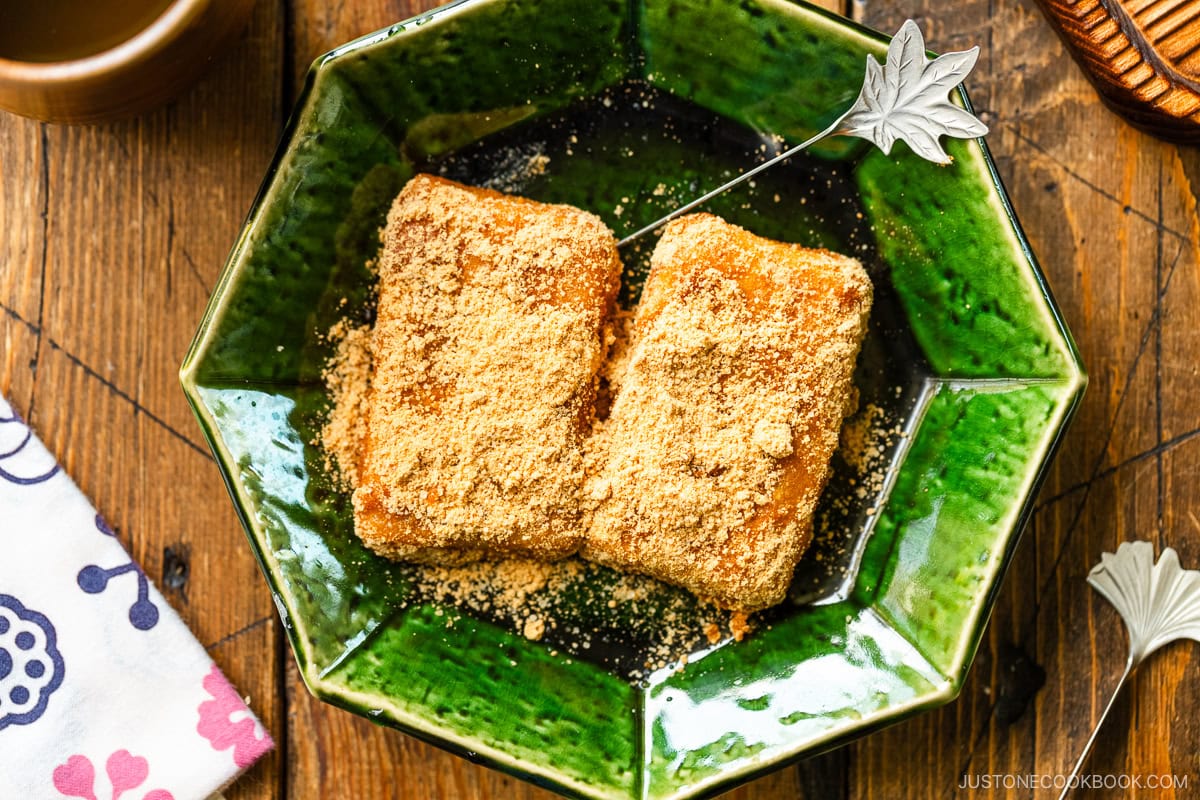
Step 13
Serve on individual plates and enjoy while still warm.
Step 14
It's best to cook the mochi right before you serve it, as the mochi will harden as it cools and the kinako mixture will loose its powdery consistency. I recommend preparing only as much kinako mochi as you will consume.