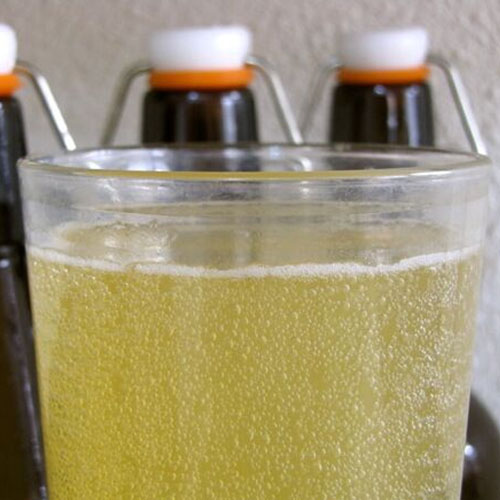
Kombucha
4.3
(8)
Your folders
Your folders
Author : Wardee Harmon
Ingredients
Export 5 ingredients for grocery delivery
Instructions
Step 1
Use 1/2 gallon water, 6 tea bags or 2 tablespoons loose tea, and 1 cup sweetener (or 3/4 cup honey) for each gallon of Kombucha you’re brewing. *Feel free to scale up to make multiple gallons at a time!
Step 2
Put water and tea bags or loose tea in a big pot. Add sweetener, if crystalline. If using liquid sweetener, wait.
Step 3
Bring to boil, and then remove from heat. Let steep 10 minutes, then strain out tea bags (or tea leaves). Stir in liquid sweetener, if using.
Step 4
Add cool water so that the tea temperature is comfortable to the touch.
Step 5
Add scoby to jar(s) if not already there, and barely cover with mature/finished Kombucha (about 10% as much as the jar’s volume) if not already covered.
Step 6
Divide brewed tea equally among the jar(s).
Step 7
Fill up the rest of the jar(s) with pure water to within 1 inch of top, at the place where the neck of the jar begins narrowing. This is where the scoby will float and grow. If the jar is filled too high, the scoby won’t be able to grow as well. Stir with a wooden spoon to evenly distribute water and tea.
Step 8
Turn the scoby so the lighter side is floating toward the top. If it isn’t floating at the top, don’t worry, it will rise on its own.
Step 9
Cover jar(s) with a towel to keep out fruit flies, dust, or other contaminants. Secure with a rubber band.
Step 10
Arrange jar(s) on a clean beach/bath towel in a warm place, perhaps near a heating vent or cookstove, where they can rest undisturbed for several days.
Step 11
Optional: Wrap a bath towel up and around jar(s). Lay another towel across the top. The Kombucha needs to stay warm and breathe, while being protected from dust and other contaminants.
Step 12
After 3 or 4 days, unwrap the jar(s) if they were wrapped in towels. If your house is warm, do it even sooner. The warmer your house, the faster the tea brews. My Kombucha tends to finish up around 5 to 7 days. I believe the average is 7 to 10 days or longer.
Step 13
Does the scoby look healthy? Has it risen to the top of the tea? Is it growing a lighter-colored layer on top of the older, darker part? Is its surface smooth? Are there little brown sugar castings (that is what the scoby leaves behind as it eats the sugar)? Are there little bubbles in the tea (natural carbonation)? The only thing to watch out for is fuzzy mold (like on bread). Everything else is a good sign!
Step 14
Now taste the Kombucha. Remember how sweet it tasted on the first day? You’re looking for a sweetness with a bit of a sour kick to it now. It should also have natural carbonation. If you feel a good urge to burp, yay!
Step 15
If it's too sour like tasting vinegar, it's probably brewed for too long. Continue with directions below but add more sweetener to taste and let re-brew for a few days.
Step 16
If it is still very sweet with no kick, wrap up the jar(s) again (optional) and let them continue brewing for a few more days. Check daily.
Step 17
If it is ready, it’s time to pour it off into storage containers (canning jars or 1 gallon jugs) OR move on to a second fermentation with dried fruits or fruit juices.
Step 18
Pour the contents of the finished jar(s) into a storage jar. Leave scobies in the original jar(s) with enough mature Kombucha to cover them.
Step 19
The now almost-empty jars should be lightly covered with towels as they wait to brew a new batch of Kombucha. It will be fine for many days, but why wait to start more of this delicious tea?
Step 20
For bottling, second fermentation methods and/or bottling instructions, plus updated instructions, see our Lacto-Fermentation eCourse or eBook or this #AskWardee.