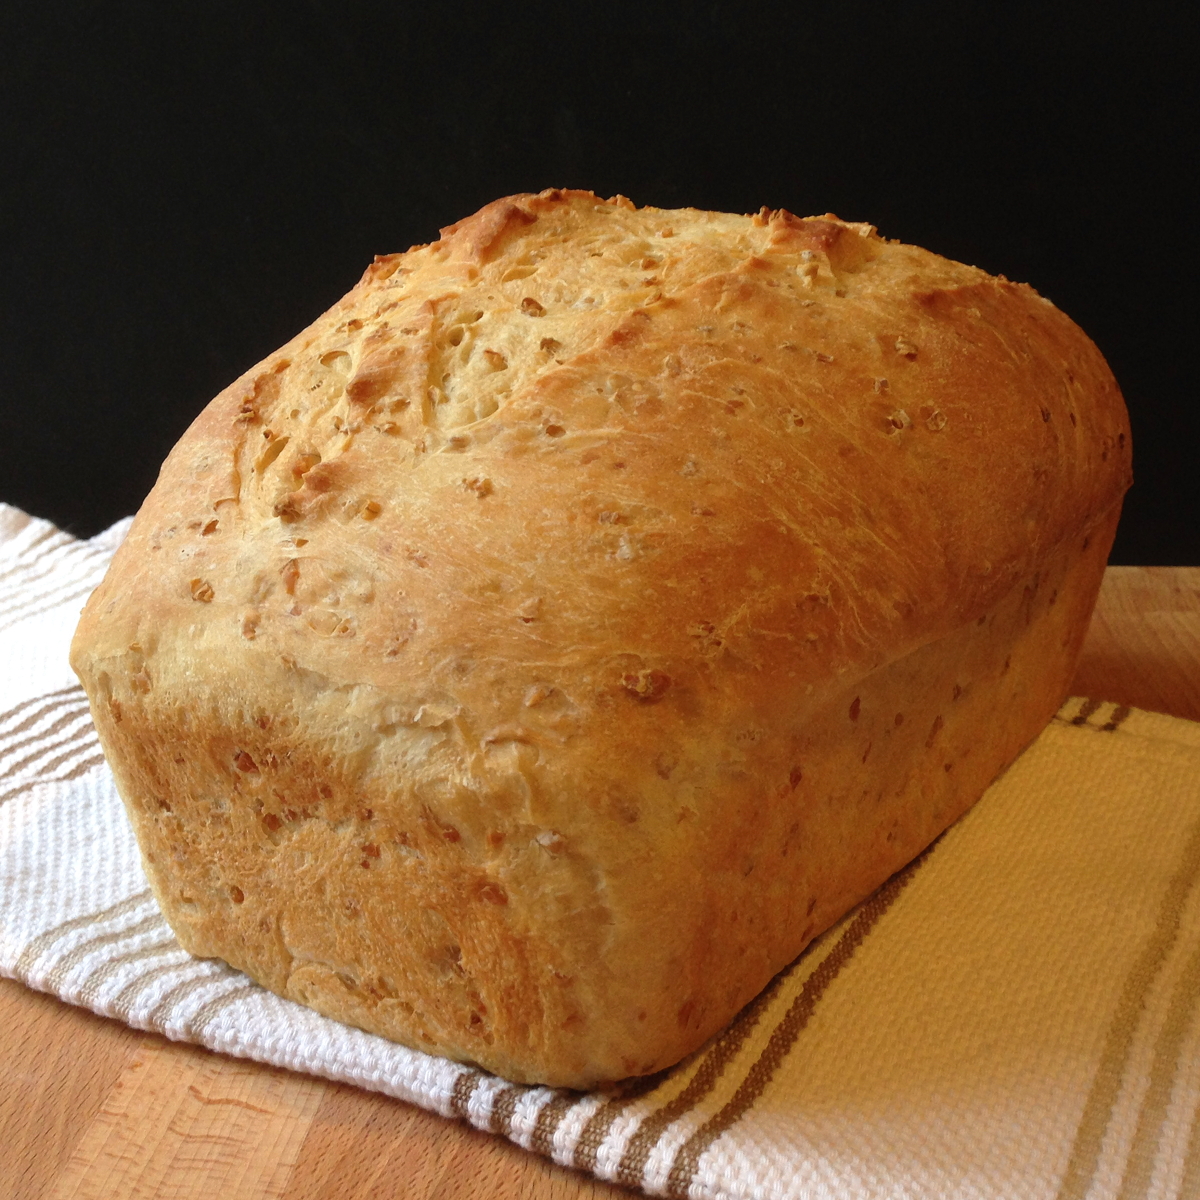
Leftover Oatmeal Bread
Your folders
Your folders
Prep Time: 30 minutes
Cook Time: 30 minutes
Total: 210 minutes
Servings: 2
Author : mlplouff
Ingredients
Export 4 ingredients for grocery delivery
Instructions
Step 1
In a large mixing bowl, put 3 cups of leftover oatmeal. Warm it (I use the microwave) to take the chill off, and stir in warm water, honey, and yeast. Stir this just enough to break up any lumps in oatmeal. Let it sit on the counter for 15 min or so, to let the yeast begin to work. By the end of 15 minutes, you’ll see some characteristic bubbles.
Step 2
A note on implements here: I love my stainless dough whisk, and use it for every stirring step when I make bread. It may look a bit weird but those twisty wires make it easy to mix even a stiff dough. This Danish-style whisk is also available with a wooden handle, but the stainless steel version is easier to wash.
Step 3
Add the salt and 2 cups flour, and mix very well. Don’t be afraid to beat it hard: you are developing gluten that will help the bread rise. Add more flour a cup at a time, mixing well after each addition, until the dough just comes together. It may take 2 more cups, or it may take a lot more, depending on the weather and humidity and all sorts of things. This is a bread where you just go by the feel of the dough.
Step 4
When the dough will just hold together in a shaggy mass, turn it out onto a well-floured counter. Knead, adding more flour as needed, for 2-3 minutes. Cover and let rest for 20 to 30 minutes. This not only lets you rinse out the dough bowl, but it allows the starches and gluten in the dough to expand and fully absorb the liquid, which makes dough less sticky and easier to handle.
Step 5
After the dough rests, knead it another 3-5 minutes, adding more flour as needed. It takes a bit of experience to know when you’ve kneaded enough. It will no longer be sucking up flour, the surface will be smooth and a bit less sticky, and it will feel alive under your hands. You can also use the windowpane test.
Step 6
Put your dough in an oiled clean bowl, turn it so that all surfaces are oiled, then cover with a tea towel and let the dough rise in a warm place until doubled in bulk.
Step 7
After the first rise, turn the dough out onto a floured surface, and gently punch it down. Divide the dough – you’ll get 2 loaves, or 24 rolls, or a combination – and shape properly. For loaves, put into a greased pan. For rolls, set, widely spaced, on a parchment-lined baking sheet. Let rise in (or on) the pans, until doubled in bulk.
Step 8
Preheat oven to 375˚F. Slash the loaves as you prefer, and bake 30 minutes. Check for doneness: it will look done, it will sound hollow when turned out of the pan and thumped on the bottom, and the internal temperature is about 190˚. See the Kitchn for a good explanation.
Step 9
Really, let the bread cool for at least an hour before slicing; this is a loaf that needs to firm up for a while. If you think you’ll want some right away, bake rolls!