Crunchy Pickled Okra (Canning and Preserving)
5.0
(12)
Your folders
Your folders
Prep Time: 10 minutes
Cook Time: 5 minutes
Total: 30 minutes
Servings: 24
Ingredients
Export 6 ingredients for grocery delivery
Instructions
Step 1
Preheat the oven to 325ºF/160ºC. Then wash the jars (and lids) in hot soapy water, rinsing them well to remove all the suds.
Step 2
Place the jars (not including rubber/plastic parts or non-heat-proof elements) in the oven for 10-15 minutes, or until the jars are completely dry.
Step 3
Meanwhile, if you plan to water bath can the jar of pickles, then prepare a large heavy-based saucepan with a trivet or steamer rack at the bottom (or canner) for canning, filling it with enough water to submerge the jars.
Step 4
Rinse the okra well and pat them dry.
Step 5
Use a small paring knife to trim the stems to around ¼ inch, avoiding cutting through the pods.
Step 6
Combine the vinegar, water, coriander seeds, peppercorns, and pickling salt in a large saucepan.
Step 7
Bring the mixture to a boil over medium heat, stirring until the salt dissolves (around 2 minutes). Then, reduce the heat to low until you're ready to pour the vinegar mixture into the jars.
Step 8
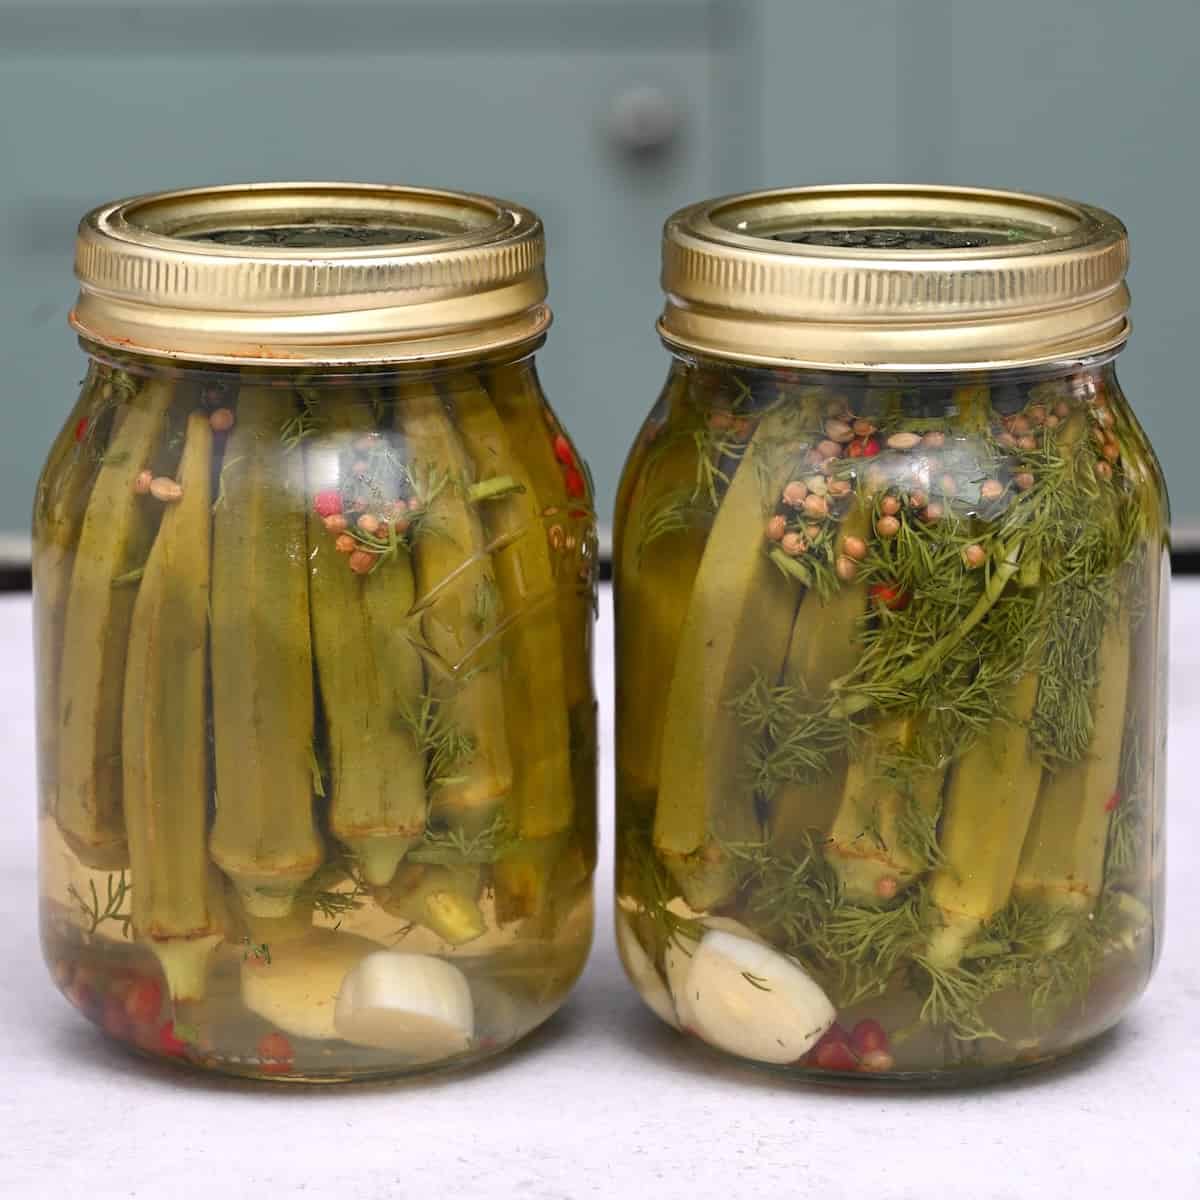
Place a garlic clove and some dill into each jar. Then pack the okra in tightly (vertically - with some upright and some upside down to help pack them in), leaving at least ½-inch (1cm) of empty headspace at the top of the jar.
Step 9
Pour the hot brine over the okra, ensuring it's entirely submerged, and the headspace is still there.
Step 10
Give the jars a tap against the counter to release air bubbles and run a sterilized butter knife between the okra and sides of the jar in case air bubbles are trapped. It can be a good idea to wiggle and press the okra with the knife, too, to encourage all the loose air to release.Keep an eye out for a few minutes, as the liquid may go down and the tops of the stems may become unsubmerged. To speed this process up, you can create several vertical slits in the sides of the okra. However, I usually avoid this, as cutting into the pods may lead to sliminess.
Step 11
Wipe the rim of each jar with a clean cloth if necessary and screw the lids on finger-tight.
Step 12
For quick pickled okra, simply allow the jars to cool and then transfer them to the fridge at this point. Allow them to "rest" in the fridge for at least 24-48 hours before enjoying the okra pickles.For water bath canned okra, continue with the next step.
Step 13
Carefully transfer the sealed jars to the hot water bath/ pot, ensuring they're submerged in 1-2 inches of water. Then, add the lid to the pan, bring it to a rolling boil, and allow it to boil for 15 minutes.
Step 14
Remove the lid from the saucepan and wait 5 minutes with the heat off. Then finally, remove the jars and set them aside on a kitchen-towel-lined counter (not a cold surface, or the glass may crack!) to cool down completely before storing them in your pantry.
Step 15
As the jars cool, you'll hear a "pop" when the lids have fully sealed.
Step 16
Fridge pickled okra: Skip the water bath canning and store the jars in the refrigerator for 1-2 months. Always use clean utensils in the jar to ensure optimal shelf life.Canned okra pickles: Store the jars in a cool, dark location (away from direct sunlight) for up to a year!