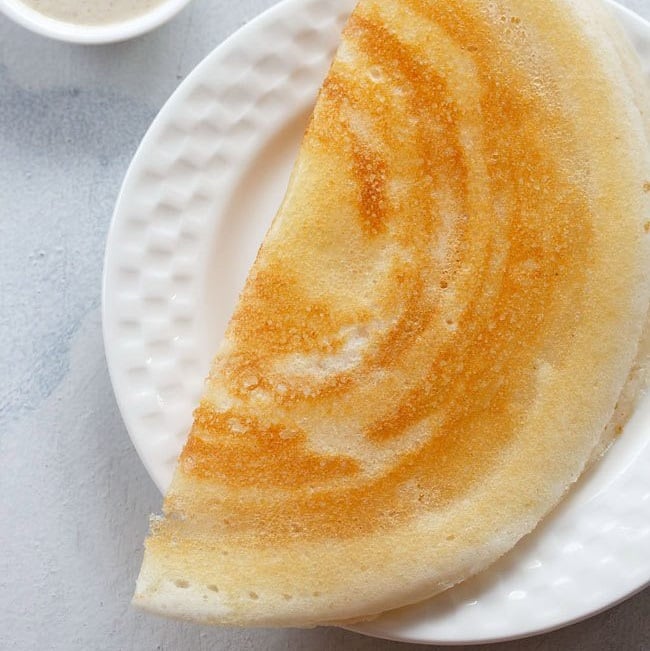
Ghee Roast Dosa
4.8
(4)
Your folders
Your folders
Prep Time: 600 minutes
Cook Time: 20 minutes
Total: 620 minutes
Servings: 3
Cost: $3.83 /serving
Author : Dassana Amit

Ingredients
Export 6 ingredients for grocery delivery
Instructions
Step 1
First take all the ingredients in bowls:
Step 2
-1.5 cups idli rice or parboiled rice in one bowl
Step 3
- 1/2 cup urad dal + 1 tablespoon chana dal + 20 methi seeds/fenugreek seeds in second bowl
Step 4
-1/3 cup thick poha in a third bowl.
Step 5
Rinse the lentils and methi seeds a couple of times. Then soak them in 1 cup water for 4 to 5 hours.
Step 6
Rinse the rice a couple of times and keep aside.
Step 7
Rinse poha once or twice and then add to the rice.
Step 8
Pour 2 cups water. Stir and soak both rice and poha together for 4 to 5 hours.
Step 9
Before grinding, strain the water from the soaked lentils and keep it for grinding urad dal.
Step 10
Add the lentils in the grinder jar. Also add 1/2 cup of the soaked and strained water to the dal.
Step 11
Grind the urad dal, chana dal and methi seeds till you get a batter which is light and fluffy. The urad dal has to be ground really well, so that the batter ferments well.
Step 12
Remove the batter in a bowl or pan with a spatula.
Step 13
Strain the rice well. Then in the same grinder, add the soaked rice and 1 cup fresh water. You can grind rice in one batch or in two to three batches. This will depend on the size of the grinder jar. I ground in one batch and added 1 cup water for grinding. You can even add 3/4 cup water while grinding. Addition of water will depend on the quality of rice.
Step 14
Grind the rice till you get a fine grainy consistency in it. The rice batter should have a fine rawa like consistency.
Step 15
Now pour the batter in the same pan or bowl containing the urad dal batter.
Step 16
Add 1/2 teaspoon rock salt or add as per taste.
Step 17
Mix the salt very well with the batter. Also mix both the batters very well. Cover and keep aside to ferment for 8 to 9 hours. You can keep batter to ferment for less or more time and this will depend with the temperature conditions in your city.
Step 18
I kept for about 13 hours and 35 minutes as it is cold during monsoons here.
Step 19
Now lightly stir the batter, before you begin to make dosa. You will also see tiny air pockets in the batter.
Step 20
Now heat a thick bottomed cast iron griddle or non stick pan. The pan should be medium hot. You can keep the flame to a low or medium while making dosas. If using an iron pan, then spread ¼ to ½ tsp oil/ghee all over the pan. Use a silicon brush or spoon or kitchen towel or an onion halve to spread the oil/ghee. Do not spread oil/ghee on a non stick pan. Do keep the flame on low to low-medium flame, so that you are easily able to spread the batter. If the pan base is very thick, then keep the flame to medium. Pour a ladle of the batter in the center.
Step 21
With the ladle gently spread the batter to get a neat round shape and a thin dosa.
Step 22
If the pan is very hot, you won't be able to spread the batter in a round circle. So for a nonstick pan, just lift the pan from the flame and keep outside for some seconds or half a minute. Then again place it on the fire. For a iron griddle, you can sprinkle some water on the pan. This reduces the temperature of the cast iron griddle. Please do not sprinkle water on non stick pan. The non stick coating can wear off.
Step 23
On a medium flame, cook the dosa.
Step 24
When the top looks cooked, sprinkle 1/2 to 1 teaspoon ghee at the sides and on the top of dosa. You can add less or more ghee as per your requirements.
Step 25
Now with the spoon spread the ghee all over.
Step 26
Keep cooking till you see the base becoming golden.
Step 27
The more the base becomes golden, the dosa becomes more crisp.
Step 28
Fold and serve ghee roast dosa hot.
Step 29
Ghee roast dosa can be served with coconut chutney or a combination of coconut chutney and sambar.