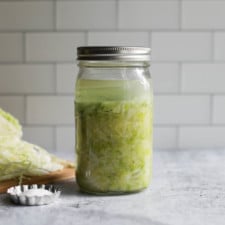
How to Make Sauerkraut
4.8
(17)
Your folders
Your folders
Prep Time: 1 hours
Servings: 3
Author : The Real Food Dietitians

Ingredients
Export 1 ingredients for grocery delivery
Instructions
Step 1
Rinse the cabbage in cool water.
Step 2
Remove the coarse outer leaves and discard them.
Step 3
Remove and rinse a few unblemished leaves and set them aside for later.
Step 4
Pat cabbage dry with a clean kitchen towel or paper towel.
Step 5
With a large knife, slice the cabbage to quarters on a cutting board. Use the knife to carefully cut away the core.
Step 6
Thinly slice the cabbage and transfer the cabbage to a large bowl.
Step 7
Add 1 teaspoon of salt.
Step 8
With your hands, massage salt into the cabbage until it starts to look wet and shiny.
Step 9
Taste the cabbage — you want to taste the salt without it being overwhelming. Add more salt, a little at a time, to get that ‘salty but not too salty’ taste.
Step 10
Continue to massage for 3-5 minutes until the cabbage becomes wet and limp, and liquid, (brine), begins to pool in the bottom of the bowl. You want to be able to squeeze the cabbage in your hands so the brine runs freely into the bowl. If you’ve put in a good effort and don’t have much brine, cover the bowl and let it sit for 45 minutes.
Step 11
Massage again until the liquid runs freely when squeezing a handful of cabbage in your hands.
Step 12
Transfer the cabbage to a clean 1-quart mason jar a few handfuls at a time. Press the cabbage into the bottom of the jar using your hand to work out any air pockets before you add more cabbage.
Step 13
Repeat until all of the cabbage has been packed tightly into the jar. You should have 2-3 inches of headspace and some brine on top of the cabbage once it’s all been pressed into the jar. If you have too much cabbage, place some in another clean jar following the same process.
Step 14
Top the packed cabbage with 1 or 2 of the reserved leaves, gently tucking them down along the sides to keep little bits of cabbage under the brine. Bits of cabbage floating in the brine should be picked out to the best of your ability to avoid developing mold.
Step 15
Place a zip-top freezer bag, or sub with a weight, into the jar, using your fingers to spread it out so that it covers as much of the cabbage leaf as possible.
Step 16
Fill with cool filtered water, sealing and pressing out as much air as possible. Tuck the top of the bag into the jar and very loosely screw the lid on the jar, or cover with a clean kitchen towel. If using a lid with an airlock, follow the directions for your particular lid.
Step 17
Store the jar out of direct sunlight in a cool place (55-75 F) to ferment for 4-14 days. Dark is best, but don’t forget about it. If you keep your jar on the kitchen counter, cover with a kitchen towel.
Step 18
After about two days, check for air pockets in the cabbage and that the brine is still completely covering the cabbage. If you notice these, use clean hands to remove the bag and gently press down to release the air bubbles. Return everything to below the brine.
Step 19
Replace the bag and lid and let it do its thing. If your sauerkraut is particularly active or the room is warm, repeat this process as needed for the next 2-3 days.
Step 20
Begin taste-testing your kraut on day 4 by carefully removing the bag and pushing the cabbage leaf aside with clean hands or a utensil. The kraut is ready when it exhibits a pleasant pickle flavor without strong vinegar acidity and has softened yet crunchy cabbage that appears more yellow and translucent. This typically happens between 4 and 14 days, depending on room temperature.
Step 21
If the sauerkraut is not ready, rinse the bag under running water. Carefully place it back in the jar making sure the cabbage is below the brine. Wait another day or two to taste again and see what you think.
Step 22
Store the sauerkraut in the refrigerator when it’s to your liking.