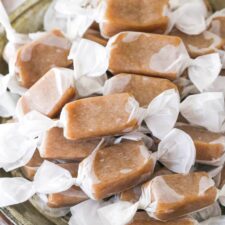
Soft Homemade Caramels
Your folders
Your folders
Prep Time: 2 hours, 30 minutes
Cook Time: 1 hours
Total: 3 hours, 30 minutes
Servings: 35
Author : Lindsay Conchar
Ingredients
Export 6 ingredients for grocery delivery
Instructions
Step 1
Line an 8 or 9-inch baking pan with parchment paper. Either size pan will work, the 8-inch will just give you thicker caramels.
Step 2
In a medium to large saucepan, combine the sugar and water. Cook over medium-low heat until the sugar is completely dissolved, about 3 to 5 minutes. Add ½ cup of the butter and let it melt.
Step 3
Turn the heat up to medium and bring the mixture to a boil. Use water and a pastry brush to clean the sides of the pan (this helps the residue on the sides of the pan not cause crystallization). Stop whisking and don’t whisk at all during this part (again to help avoid crystallization).
Step 4
Allow to boil until the mixture turns a deep golden copper color and reaches 330°F (if you’re using a candy thermometer), about 10-15 minutes, maybe longer depending on your stove. Keep an eye on it, but do not stir. If needed, you can occasionally tip the pan from side to side to help things cook evenly, and to give you a look at how dark it is and make sure it isn’t burning.
Step 5
Remove the pan from the heat and immediately add in the heavy whipping cream in a slow, steady stream. The caramel will bubble up quite a bit, so be careful with this step. Whisk quickly and well as you add the cream, whisking until well combined.
Step 6
Add the remaining ½ cup of butter and let it melt, then add the corn syrup and stir to combine.
Step 7
Place the pan back over medium heat and bring to a boil (it’ll happen quickly). Stir often with a silicone spatula to help prevent burning. After stirring, you can use water and a pastry brush to clean the sides of the pan (this helps the residue on the sides of the pan not crystallize).
Step 8
Cook the caramel until reaches 240-245°F (I prefer 245°F). The higher the temperature, the firmer the caramels will be. If you don’t have a candy thermometer, you can also test it the old-fashioned way by dropping a spoonful of hot caramel into a cup of ice water. If you can shape it into a fairly firm but slightly sticky ball, it should be ready.
Step 9
Remove from heat and stir in the salt and vanilla extract. It will bubble up a bit, so be careful.
Step 10
Pour the caramel mixture into the prepared pan and allow to cool completely. They can cool at room temperature or in the fridge. They are firmer and easier to cut when cold, and are softer (but totally still cut-able) at room temperature.
Step 11
Cut the caramels to your desired size and wrap them in wax paper. Store them in an air-tight container at room temperature or in the fridge, but serve at room temperature. They should keep well at room temperature for about six to nine months.