Candy Bar Pie Snaps Recipe
Your folders
Your folders
Servings: 7.5
Author : Christina Tosi
Ingredients
Export 14 ingredients for grocery delivery
Instructions
Step 1
For the chocolate wafers:
Step 2
In the bowl of a stand mixer fitted with the paddle attachment, cream together the butter, sugar, honey and vanilla on medium speed for 1 minute until smooth. Scrape down the sides of the bowl with a spatula.
Step 3
Add the flour, cocoa powder, salt and baking soda and paddle on low speed until just combined, about 20 seconds.
Step 4
Turn the dough out onto a work surface, divide into 2 equal pieces, and flatten into 2 evenly shaped pancakes. Roll each dough pancake out between two sheets of parchment paper to a 1/2-inch thickness (using parchment here is a real sanity saver, so don't skip it!). Using a 3-inch round cookie cutter (or water glass), cut the dough rounds as close to one another as possible. Refrigerate or freeze the entire sheet of dough for at least 30 minutes.
Step 5
Heat the oven to 325 F. Pan-spray or line two sheet pans with parchment paper or silicone baking mats.
Step 6
Pop your chilled rounds off the parchment and transfer them to the prepared pans, spacing them 1/4 inch apart. (They don't spread in the oven!) Reshape the dough scraps into a ball and roll out, cut and chill, repeating until you run out of dough.
Step 7
Bake each sheet of cookies at 325 F until the edges are set and the center is no longer glossy, 10 to 12 minutes. (It's hard to know when a chocolate wafer is baked properly, so set a timer!)
Step 8
Let the wafers cool completely on the pan before layering into a snap. If made in advance, these cookies will last in an airtight container in the fridge for up to 5 days.
Step 9
For the peanut butter caramel:
Step 10
In a heavy-bottomed medium saucepan, 1/4 cup of the sugar over medium-high heat. As soon as the sugar starts to melt, use a heat-resistant spatula to move it constantly around the pan — you want it all to melt and caramelize evenly to a gorgeous amber color. Once the first amount of sugar has taken on color, add an additional 1/4 cup of sugar to the existing caramel in the pan, repeating the previous steps — cook and stir, cook and stir, until the mixture is once again a gorgeous amber color. Continue adding 1/4 cup sugar twice more until all the sugar has become one pretty pan of caramel.
Step 11
Remove the saucepan from the heat. Very slowly and very carefully, stir in the heavy cream. The caramel will bubble up and steam; stand away until the steam dissipates. Use the heat-resistant spatula to stir the mixture together.
Step 12
Carefully add the peanut butter, vanilla and salt, stirring constantly. If the mixture is at all lumpy, put the saucepan back over medium heat and stir constantly until the sugar bits have dissolved and the mixture is smooth.
Step 13
Let the caramel cool completely before using. It will keep in an airtight container in the fridge for up to 1 month.
Step 14
For the vanilla milk chocolate coating:
Step 15
In a microwave-safe medium bowl, melt the milk chocolate chips and oil in the microwave in 30-second spurts, stirring after each, until smooth, about 2 minutes (but every microwave heats at different strengths). Use a heat-resistant spatula to ensure the mixture is fully melted and homogenous. Stir in the vanilla. Keep warm or remelt if necessary, before using.
Step 16
To assemble:
Step 17
Top each wafer with 1 tablespoon of peanut butter caramel — don't get greedy! Using the back of your spoon, spread it evenly across the surface, but don't spread it all the way to the edge. You don't want it pouring over!
Step 18
Place 2 pretzels side by side on top of the caramel layer, pushing lightly so they stay in place. Transfer the wafers to a plate or baking sheet and pop them in the freezer to ensure maximum coolness while you set up your dipping and topping stations.
Step 19
Put a large piece of parchment paper or a silicone baking mat on the counter, or spray two sheet pans. Reheat the chocolate coating in the microwave in 15-second spurts to ensure it's warm and fluid. Repeat this warming process as needed if your coating cools down and thickens or forms lumps.
Step 20
Pull the cookies out of the freezer and, one at a time, dunk each cookie, pretzel-side down, into the melted chocolate. Use a fork to flip the cookie right-side up to get an even coat.
Step 21
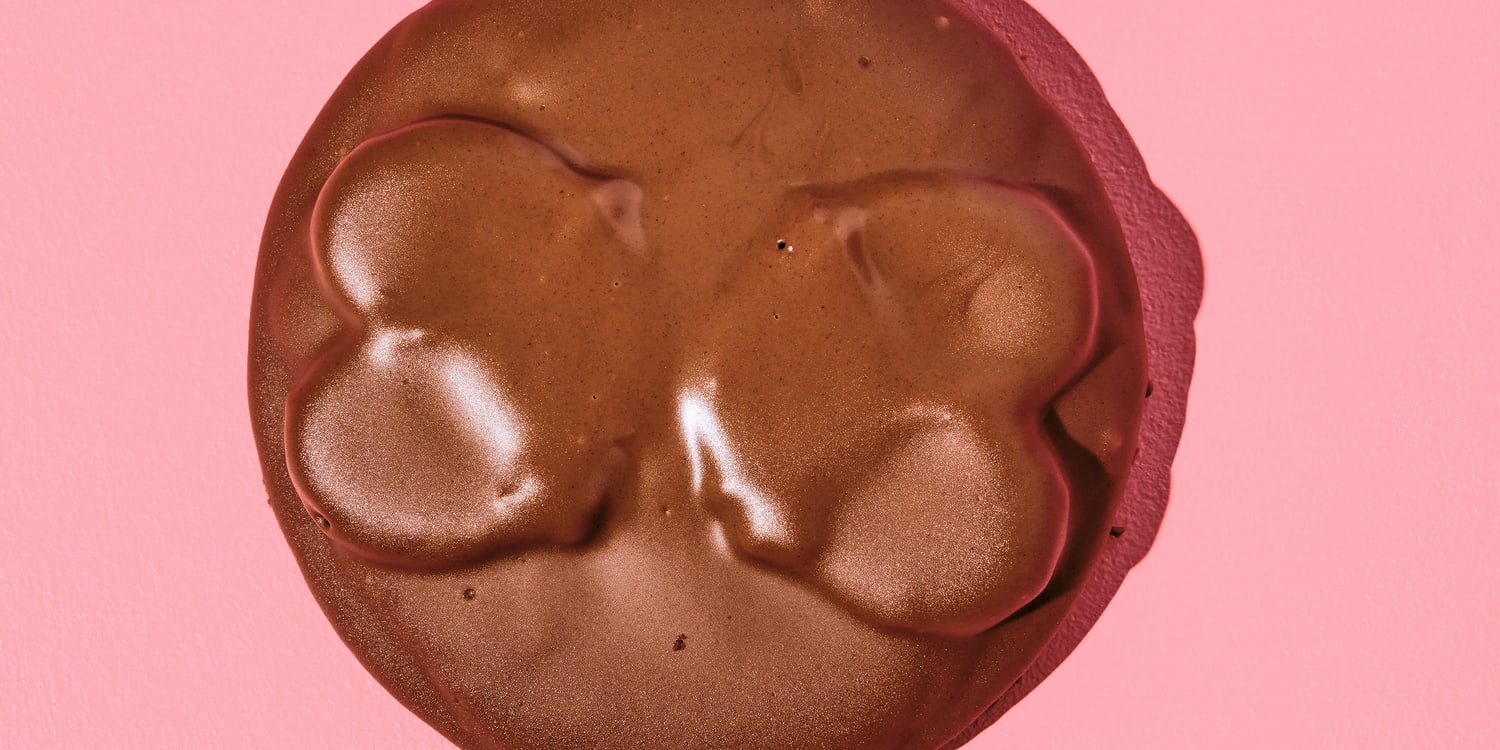
Use the fork to scoop the cookie out of the chocolate. Tap the fork gently on the side of the bowl to encourage any excess chocolate to drip back into the chocolate mix and the outlines of the pretzel tops to show. Carefully transfer the dunked cookie to the parchment paper. Repeat until all the snaps are coated.
Step 22
Allow the coated snaps to set for a minimum of 1 hour at room temp, or speed it up in the fridge or freezer.
Step 23
Serve at room temperature. Snaps will keep in an airtight container in the fridge for up to 1 week or freezer for up to 1 month.
Step 24
Reprinted from " All About Cookies" Copyright © 2022 by MomoMilk, LLC. Photographs copyright © 2022 by Henry Hargreaves. Published by Clarkson Potter, an imprint of Random House.