Cast Iron Skillet Roasted Beef w/ Red Wine Gravy
4.3
(20)
Your folders
Your folders
Prep Time: 10 minutes
Cook Time: 50 minutes
Servings: 4
Cost: $12.07 /serving
Author : Liam
Ingredients
Export 11 ingredients for grocery delivery
Instructions
Step 1
Preheat oven to 500 degrees - as high as it will go. Use convection roast, if using a convection oven. It helps to let the roast come up to room temperature--some say this is a must, but I don't worry too much about it.
Step 2
Crush and dice the garlic cloves in a bowl. Add about 2 tbsp of the olive oil. Dice up the 2 tbsp butter and add to bowl. Mix in the remaining dry ingredients and mash with a fork. You want a nice smooth paste to rub on the beef.
Step 3
Drizzle 1 tbsp of olive oil in the skillet. Place the beef in the skillet, fat-side up. Rub the entire contents of your wet rub onto the top of the beef, working some on each side or 'face' of the beef.
Step 4
Place skillet in middle rack of oven. This sucker will be hot and might smoke at first, so use the overhead fan and have a dishtowel ready to wave over the fire alarm (maybe that only happens in my house.) Set a timer for 8 minutes. It will really sizzle after a few minutes. This is exactly what you want--a good sear.
Step 5
Lower the heat to 350 degrees and cook for 18-20 minutes a pound. 18 minutes for more rare. This is the magic formula. I have seen this cooking time from a few cookbooks, and don't recall where I first saw it, but it is easy to remember and works every time. So, for a 2.5 lb roast, which I used here, I put the timer on for 45 minutes and started prepping the side dishes.
Step 6
Use a meat thermometer to test for doneness. You don't have to, but it at least gets you in the ballpark as to whether you have a blood-red roast on your hands or overcooked-shoe leather and you need to order take out instead :) You can use a digital, but I have used the same simple cooper thermometer for the past 20+ years. It should be lower than the target temp you are shooting for, since we will be tenting the meat and it will keep cooking. I aim for around 135 degrees and poke the meat in a few spots until the probe hits the center. It will continue cooking internally after you tent it.
Step 7
Remove the roast from the oven, and just admire that bad boy for a few seconds. Yeah, you got this.
Step 8
Transfer the roast to a plate or cutting board.
Step 9
Tent it with foil. This step is crucial, and my wife always scolds me when I do not let the roast sit long enough. You want to let it rest and have the juices recirculate for at least 10 minutes. It is still actually cooking internally
Step 10
Now--the magical gravy, and this is why I like using the skillet. Simply slap that bad boy on the burner with all the drippings and set to med-high heat.
Step 11
Add somewhere between 1/4 cup to 1/2 cup of wine--I do not measure, so I am guesstimating. It does not half to be precise...more wine gives more wine flavor--its that simple. Let the wine boil off and stir occasionally as you prep your other sides.
Step 12
After 4-5 minutes of simmering, the juices will thicken a bit. I like to be able to gently scrape the skillet with a wooden spoon and be able to see the bottom for a few seconds--this gives great consistency to the gravy.
Step 13
Add the cup of broth and let start to boil slightly. Prep a slurry of cornstarch and water--about 2 tbsp of cornstarch to 1/4 cup of water. Added bonus, you can see the brand of wine I am using in this picture.
Step 14
SLOWLY pour half of the slurry into the bubbling juices as you stir with wooden spoon. Wait. Stir well. DO NOT POUR THE WHOLE THING AT ONCE OR YOU GETTA THE LUMPS! CAPISCE? This is an art and there actually is science behind the whole thing, but I digress.
Step 15
Take your time here and only pour in a little at a time, stirring and pausing to avoid lumps. Stir until you have the desired consistency. You dont want it too thick, either.
Step 16
You can now untent the roast and start slicing--the thinner the better, but I am usually salivating so much after the first few slices, the remaining ones tend to be thicker, so my guests usually get the first slices or I let the family fight over those.
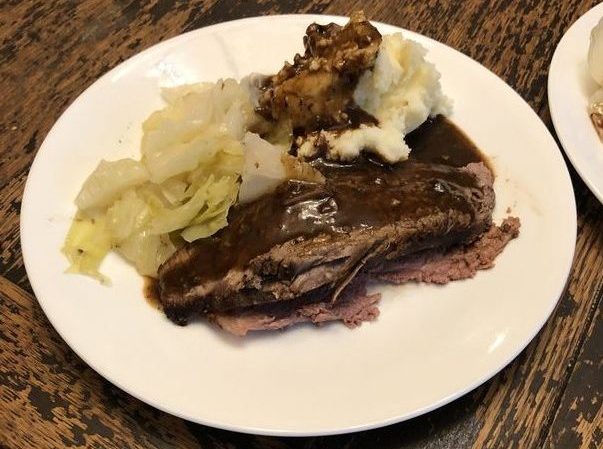
Step 17
This was the first time I had done skillet roast in a long time, and I was really pleased with the results. If you prefer a more well-done roast, simply cook for 5-10 minutes longer, and the opposite if you prefer your roast rare. I recommend some mashed potatoes and another side to help sop up the gravy, which I will link to in this post. Enjoy!