How To Make Chocolate From Cocoa Beans (Bean to Bar Chocolate)
5.0
(108)
Your folders
Your folders
Prep Time: 14400 minutes
Cook Time: 20 minutes
Author : Samira
Ingredients
Export 1 ingredients for grocery delivery
Instructions
Step 1
These two steps are the only ones that I have no part in, but I thought I'd include them in the process for full transparency.To begin the process of making chocolate the first step is to open the cacao pod. When doing this at home I find it easiest to hit the shell with something like a wooden muddler or hammer, if you have one.Once you cut open the cacao pods, you'll see the cacao beans, which are covered in a viscous white 'mucilage' coating:The white jelly pulp/coating is actually edible too. Traditionally it's eaten as-is or blended with water into a juice 'cacao juice'. The flavor is sweet-tart/acidic and has similarities with soursop.The hard bean inside is the cacao bean. At this point, we have yet to ferment or roast is so it's fairly 'wet' looking with a purple color and brain-like appearance when you cut into it due to all the individual nibs inside.
Step 2
I lined a large bowl with banana leaves then filled it with the beans, topping it with a layer of banana leaves.
Step 3
Just like when allowing bread to rise, this now needs to be placed somewhere warm. Between 40-50ºC is the optimal temperature. This can be helped by placing them next to a heat source or even placing a hot water bottle within the container you use (that can be removed and replaced 1-2 times a day if needed).
Step 4
As the beans heat, they will start to produce their own heat too (usually after a couple of days), which helps the process along. As the beans ferment the white layer will break down into a juice so it's a good idea to drain this once per day (or twice if possible) and mix the beans.Check the beans a few times during the process in case there are any that look moldy - remove these and continue with the process.This process takes around 5 days but can take slightly longer depending on the heat, humidity, and individual beans. I allowed my beans to ferment and dry all while wrapped in the banana leaves - some methods may change the process for drying but I find it unnecessary.
Step 5
Place the beans in a single layer across the dehydrator trays, leaving space between the beans for airflow.
Step 6
Run the dehydrator at 104ºF/40ºC for several days. This can take between 5-10 days; I did it for 5 days.During this process, the beans will turn from a purple color to a pink/reddish-brown to a darker brown and will massively reduce the liquid content of the beans. It doesn't work quite as well as the traditional method but will work.
Step 7
Before roasting the beans, you'll first need to remove any beans that are broken and/or smell moldy, etc. Then, lay the beans in a single layer on parchment-lined oven tray/s. You can roast the beans whole then peel them or peel them first before roasting.If you peel the husk first then you can break the bean into the nibs and have more surface area while roasting. That way they roast faster and more evenly. However, it is much easier to peel them after roasting so the preference is up to you.
Step 8
Roast the beans in the oven at 250ºF/120ºC fan-assisted for between 15-20 minutes for a fairly light roast.The way you roast the beans will have a big impact on flavor and you can choose to do a light, medium, or dark roast. This is something I'm still experimenting with and will update over time.During the end of the roasting step (if roasting as whole beans), air pockets will escape the beans, making popping sounds - this is normal. When they're almost done, you may also smell a 'brownie' smell. The husk should also come off the beans easily.
Step 9
The title makes this process sound complicated; however, what cracking and winnowing of chocolate actually means is just removing the cocoa bean from the shell to reveal the cacao nibs inside. If you've done this before roasting then - skip this step!There are several ways to do this, but pressing the beans between your fingers should be enough to loosen the shell from the bean. Do this with all of the beans putting the shells in a separate bowl from the beans (nibs).
Step 10
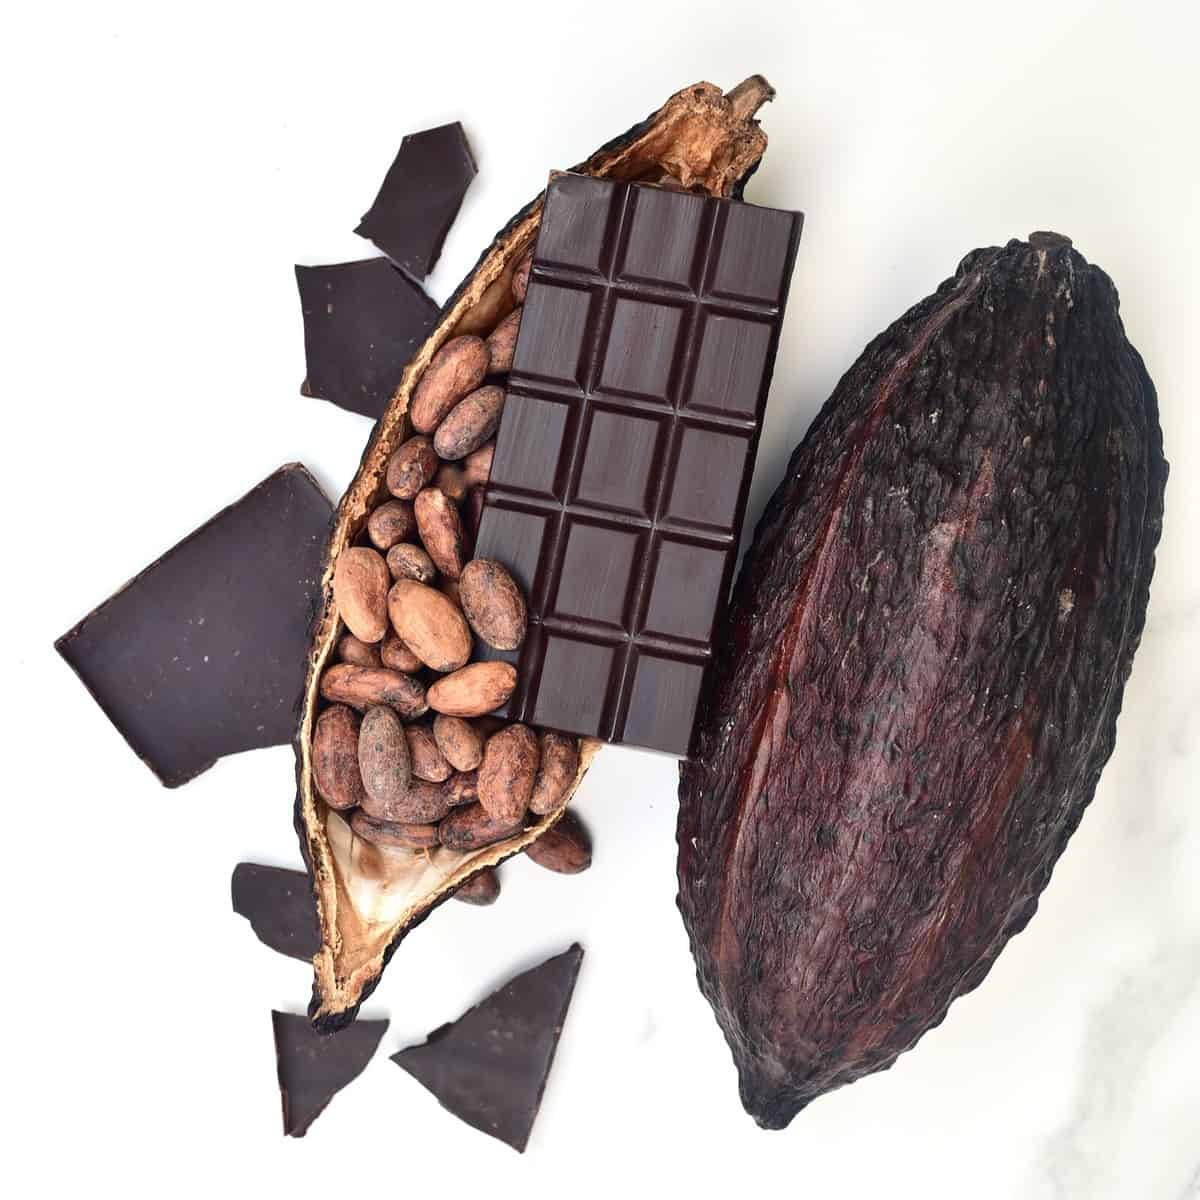
Next, break the beans down into individual nibs. You can do this by hand or place all the beans into a bag and bash with a rolling pin to separate the nibs.These cacao nibs can now be eaten as is or further processed into chocolate. Interestingly these nibs are made up of around 50% cacao solids (what will become cocoa powder) and 50% cacao butter.
Step 11
Even if you're using a grinder, it's still a good idea to help the process by pre-grinding the nibs into smaller pieces. You can do this in a high-speed blender, food processor, or electric coffee/spice grinder. If using a small grinder, then do this in batches.
Step 12
Then add the ground nibs to the chocolate grinder (melangeur) and allow it to run for about 12 hours.
Step 13
Like above, it's best to use a high-speed blender, food processor, or electric coffee/spice grinder to start this process. However, the best results are with the small grinder.
Step 14
With a grinder: Add the nibs in small portions to the grinder and grind into a paste - the cacao butter will start to extract from the nibs (similar to when making nut butter), and the powder will become wetter and more paste-like.This process can take several minutes, so I suggest allowing the machine a break after every minute or so.With a high-speed blender: first, blend the beans into a powder until the point they are just starting to look slightly wet. Then, transfer them to the microwave for 20-30 seconds (depending on how powerful your microwave is). This will help to encourage the extraction of the cacao butter. Finally, add the nibs back to the blender and process into a paste.
Step 15
At this point, no matter which method you used (grinder/blender), you can add the powdered sugar (never liquid!) to your grinder/blender (you can use granulated if using a mortar & pestle, but it will help to use powdered sugar for best texture) and continue to process slightly more. Next, it's time for the 'conching' step.
Step 16
Heat a mortar and pestle in the oven for just a few minutes (until warm but not too hot to touch).Then add the cocoa liquor and use the mortar and pestle to manually grind this until you can no more. This will never get as smooth as it will with a chocolate grinder, but every little bit helps and will change the flavor and texture.When doing it this way, you need to add additional cacao butter as it will never get as smooth as it will with the wet grinder/conching method, so the extra butter will help with consistency - for a smoother, creamier, glossier texture. Don't add more than 10% of the total chocolate weight, though (i.e., 10g per 100g bar chocolate)Taste the chocolate every 5-10 minutes, and when you are happy with the flavor, the chocolate is ready for the next step.Note: If you've made a large batch of chocolate (around 1 lb/500g), you can conch it using a stand mixer with the paddle attachment, whipping on low speed for around an hour.
Step 17
Tempering chocolate is the process of strategically raising and lowering the temperature of the chocolate to form a specific crystal structure within the chocolate that yields shiny, glossy, snappable chocolate that holds its' shape at room temperature.You don't have to do this process at all if preferred. You can also mold the chocolate for now to temper at a different time. There are three main methods for tempering chocolate, which I discuss in a separate post.
Step 18
Pour the prepared chocolate into your mold of choice, tapping it against your kitchen counter to remove any air bubbles and help it settle.
Step 19
Allow the chocolate to set fully (best done at room temperature) before de-molding and wrapping.I find that polycarbonate chocolate molds work best, even better than silicone molds. To prep polycarbonate molds it's best to use cotton balls and a type of fat-soluble sanitizer. Water can leave marks and a sponge can create micro-scratches that will affect the shine.
Step 20
The rules for storing chocolate will change somewhat depending on whether or not you've tempered it.Untempered chocolate is best kept in the fridge or freezer, wrapped tightly.It's important to note that chocolate absorbs other flavors and aromas, so it's important to either wrap it carefully or store it within an airtight container (no one wants chocolate with a garlic-y aftertaste!)For tempered chocolate, it's actually best to avoid refrigerating the chocolate. This is because temperature fluctuations can cause the chocolate to bloom (where it has white sugar crystals on the chocolate giving it a moldy/dusty appearance) and will affect the taste and texture.Instead, store the chocolate in a cool, dry place away from sunlight.Either way, the chocolate will last for months this way!