No Bake Banana Cheesecake Recipe
5.0
(2)
Your folders
Your folders
Prep Time: 30 minutes
Cook Time: 20 minutes
Total: 50 minutes
Servings: 10
Author : Jocelyn Delk Adams
Ingredients
Export 11 ingredients for grocery delivery
Instructions
Step 1
Measure out all of the ingredients for the pudding prior to starting. Place egg yolks in a separate bowl.
Step 2
In a medium-size saucepan, add sugar, flour and salt, and whisk to combine.
Step 3
Add the heavy whipping cream and vanilla extract, and heat the mixture on the stove top over medium-low heat. Whisk constantly to dissolve the dry ingredients into the cream mixture.
Step 4
After 5 or so minutes, once the mixture is warm (but not boiling), pour about ¼ cup of the cream mixture into the egg yolks and whisk vigorously to temper.
Step 5
Immediately pour the egg yolks into the saucepan and continue whisking over medium-low heat to prevent the eggs from cooking. Whisk until pudding starts to thicken. Once the mixture is thick and bubbly, remove it from the heat.
Step 6
Strain pudding through a fine sieve into a medium-size bowl. This step is optional, but it will help catch any lumps of ingredients that did not get blended.
Step 7
Immediately cover the top of the pudding with clear plastic wrap (directly on the surface of the pudding), and poke a few holes with a toothpick. Allow the pudding to cool for 30 minutes at room temperature, and then refrigerate for 2 hours until the pudding is cold.
Step 8
Prepare a 9-inch springform pan by lightly greasing the edges of the pan with cooking spray, and then wiping gently with a paper towel.
Step 9
Grind the wafers into fine crumbs using a food processor or blender. In a microwave-safe bowl, microwave the butter for 45-60 seconds until the butter is melted.
Step 10
In a separate medium-size bowl, pour the melted butter into the cookie crumbs and stir until there are no dry crumbs left. Pour the crumbs into your springform pan and press firmly into the bottom to create a thick crust.
Step 11
Beat cream cheese on medium-high speed for 2-3 minutes until it’s light and fluffy.
Step 12
Slowly add sugar into the cream cheese while continuing to beat the mixture, scraping down the bowl as needed.
Step 13
Next, add heavy whipping cream and vanilla extract. Beat until the filling is smooth and creamy.
Step 14
Pour cheesecake filling into the prepared pie crust, cover and refrigerate for 2 hours.
Step 15
Prepare the whipped cream by placing the mixing bowl in the freezer for 5-10 minutes to chill. Pour heavy whipping cream into the chilled bowl and use an electric mixer to beat heavy cream on medium-high speed until the cream gets bubbly.
Step 16
Slowly add powdered sugar and continue beating on high speed until stiff peaks form. Separate out 1 ¼ cups of the whipped cream for piping edge on cake.
Step 17
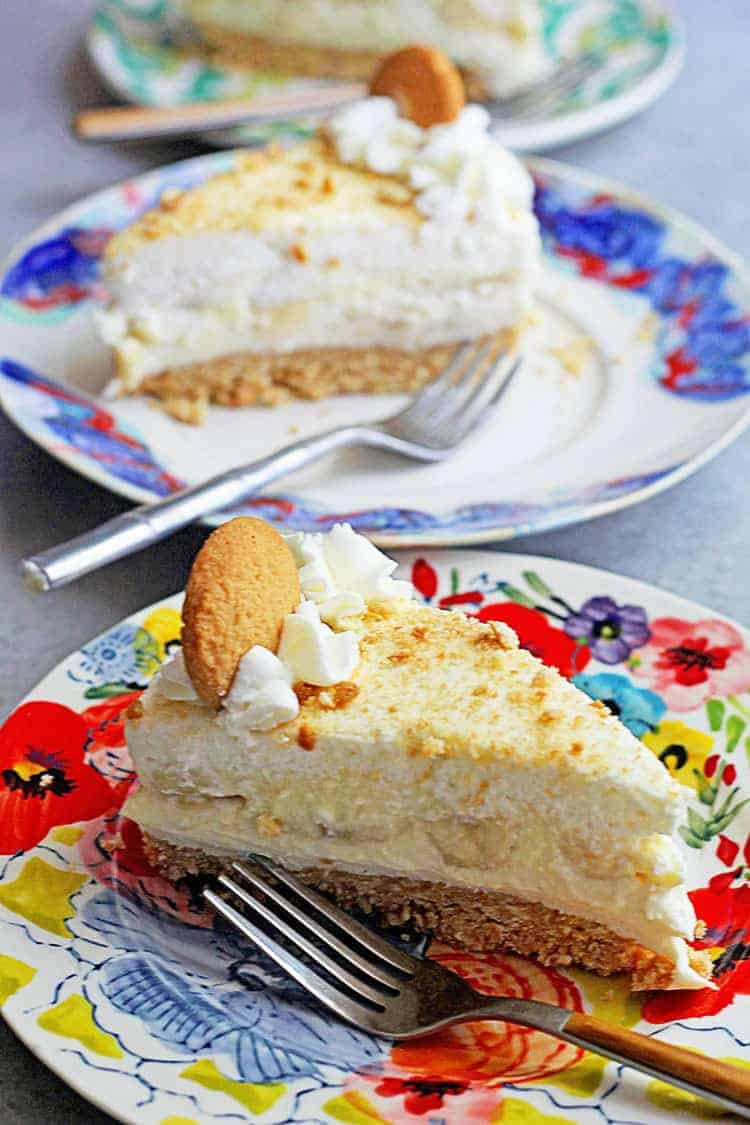
To assemble cheesecake, slice bananas about 1/2 inch thick. Start by aligning them on the outside of the cheesecake and work your way in toward the middle. Pour chilled pudding over the top of sliced bananas, spreading evenly. Add whipped cream on top and spread smoothly.
Step 18
Use the prepared whipped cream to pipe a border along the top of cheesecake. Garnish with crushed vanilla wafers. This cheesecake must be refrigerated for another 2-4 hours before serving to allow all the ingredients to set properly.